All Businesses & Actions
Written By Anand Raj
Last updated 4 days ago
The Businesses module is the central directory of every business connected to your agency. From here you can search any business, add a new one, and run quick actions like View, Edit and Reset directly from the list. It surfaces high-level lifecycle metrics, historical trends, integration usage, and churn risk indicators, enabling agencies to monitor account health and take proactive action.
Open the Businesses module
From the left sidebar of the Agency Portal, click Businesses.
The module can be viewed in two views using the toggle in the top-right corner:
List View — a tabular listing of all businesses. (described in this document).
Insights View — a dashboard view with charts and churn analytics
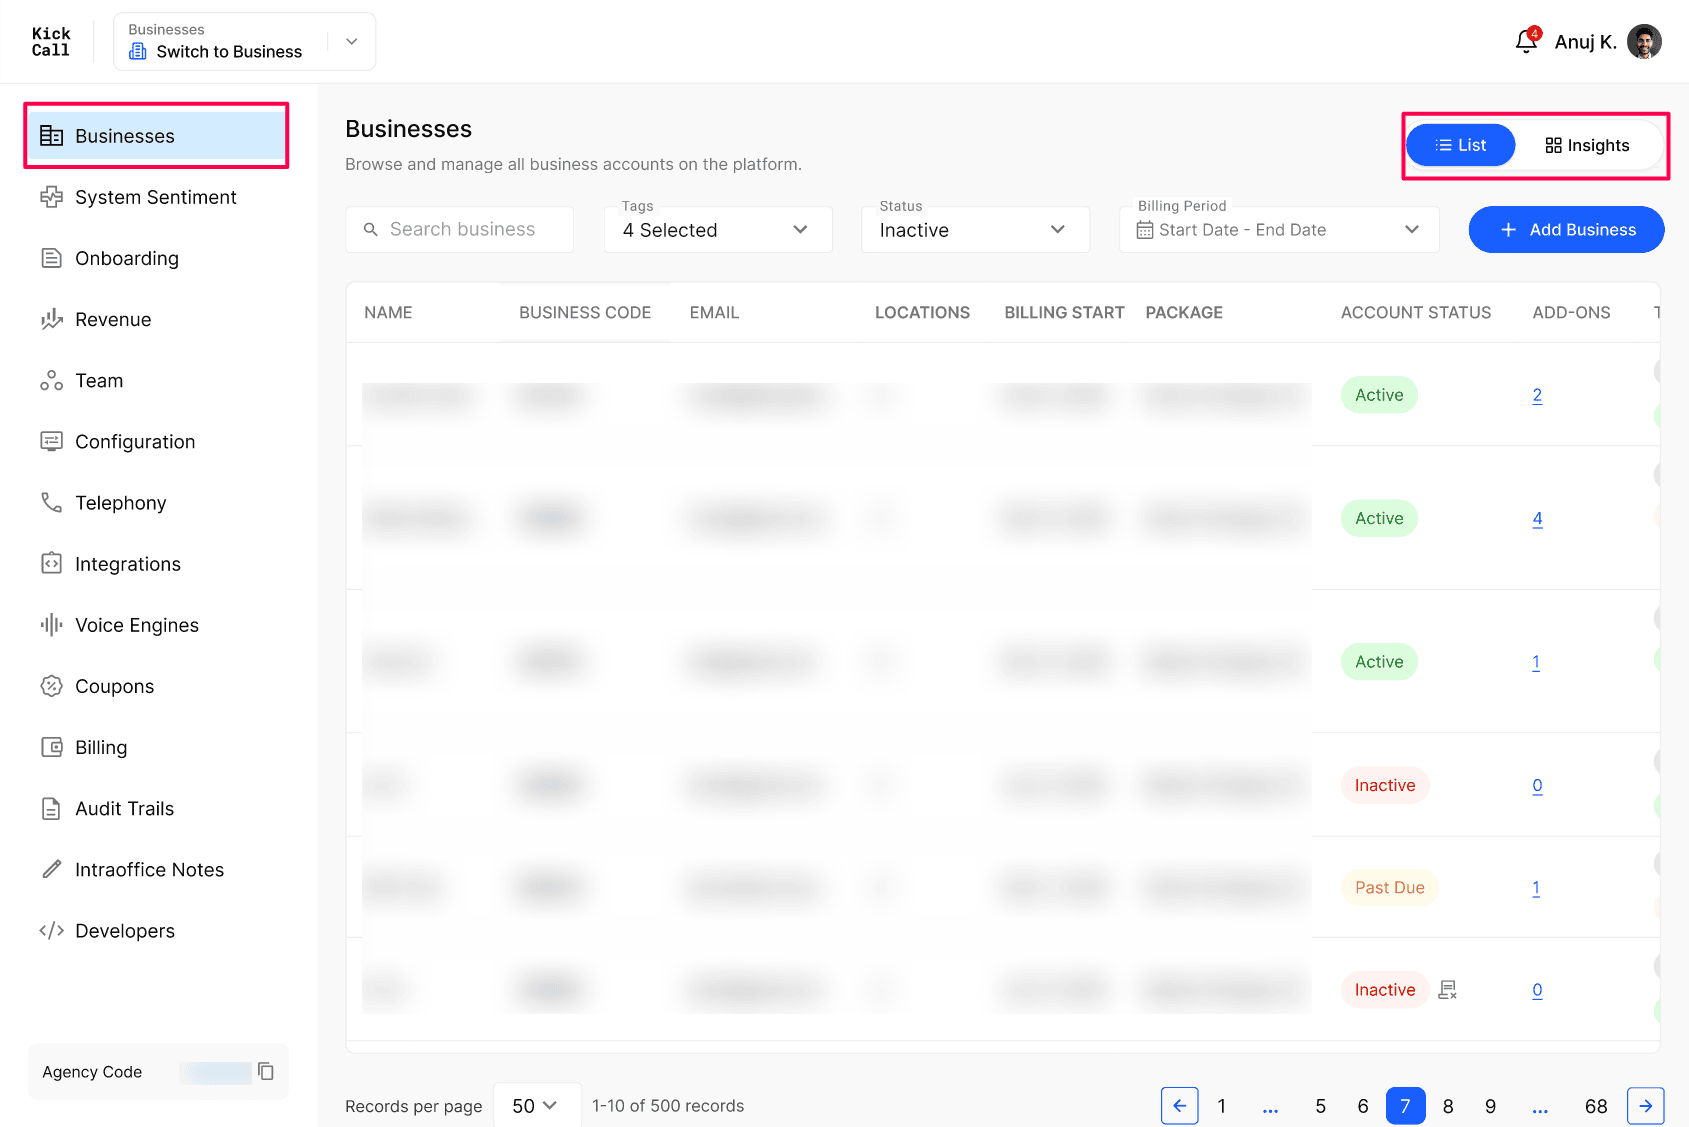
Lists View
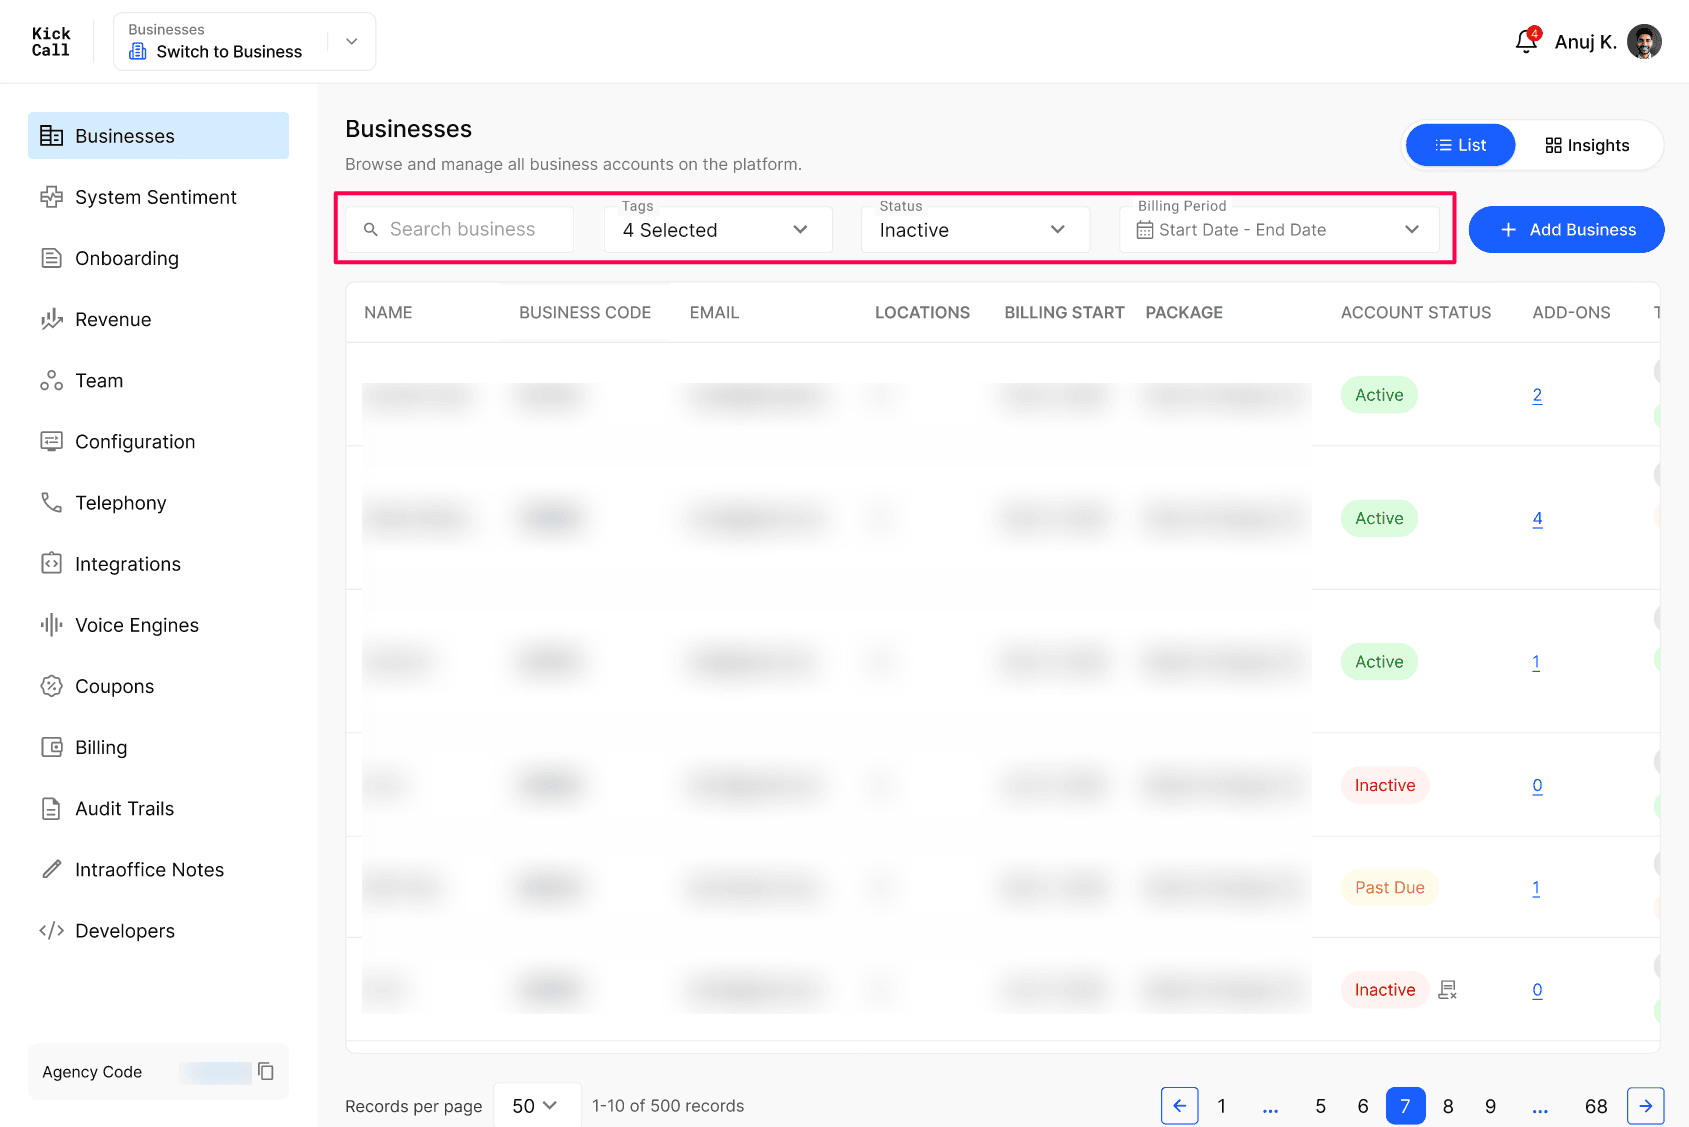
Each row shows the business Name, Business Code, Email, Locations, Billing Start, Package, Account Status (Active, Past Due, Inactive, Archived) and the Action icons. User can Search and filter the list.
Use the Search business bar at the top to find a business by name or email.
Use the Tags filter to narrow the list to businesses carrying one or more tags. The dropdown is grouped by tag category and shows how many tags are currently selected (for example, 4 Selected).
Use the Status filter on the right to narrow the list (Active, Past Due, Inactive, Archived).
Use the Billing Period filter to show businesses whose billing falls within a specific date range. Choose a preset (Yesterday, Last 7 days, Last 30 days, Last 3 months, Last 6 months, Last 12 months, or Till date) or pick a custom Start date and End date from the calendar.
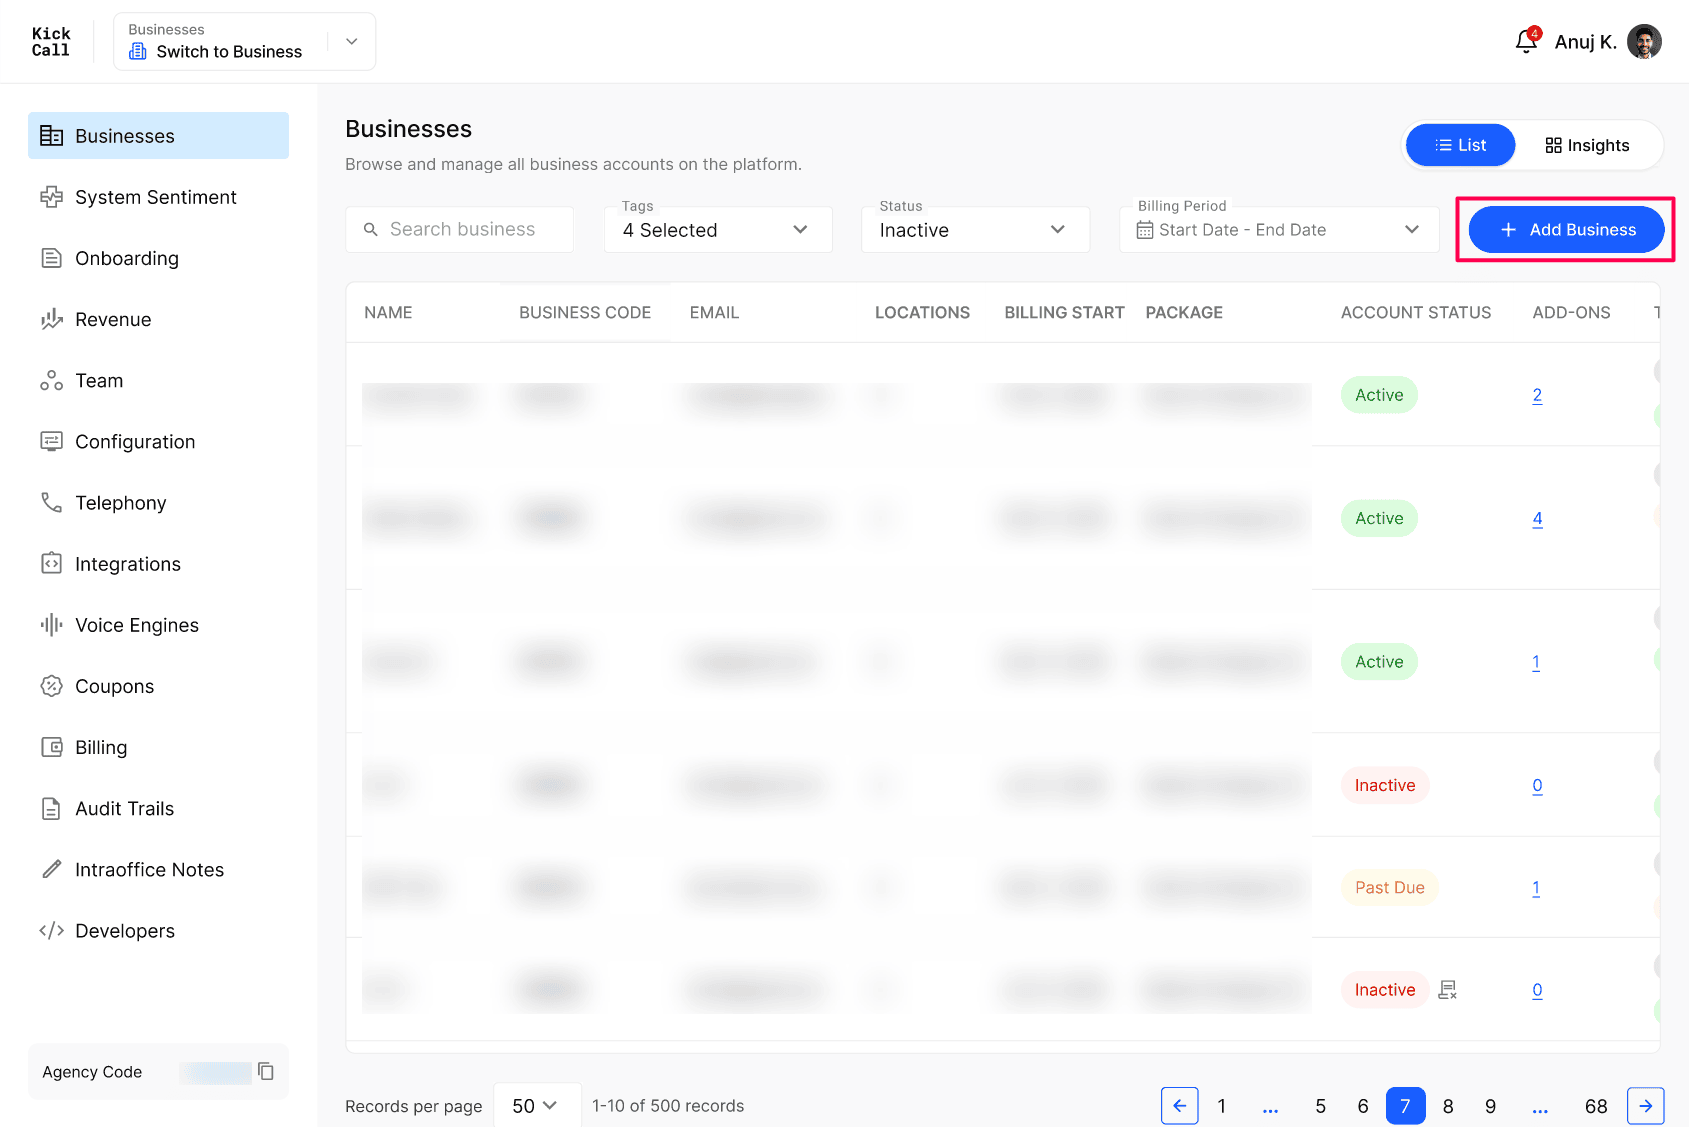
Add Business (top-right CTA)
The + Add Business button at the top right lets you create a business directly from the Agency Portal.
Important: Avoid creating live businesses from here. The recommended path to onboard any real business is the Business Onboarding form, which captures everything required for go-live (billing, locations, owner details, telephony, etc.).
Use Add Business only for your exploration phase, internal test businesses or demo accounts. For live businesses, always use the Business Onboarding form.
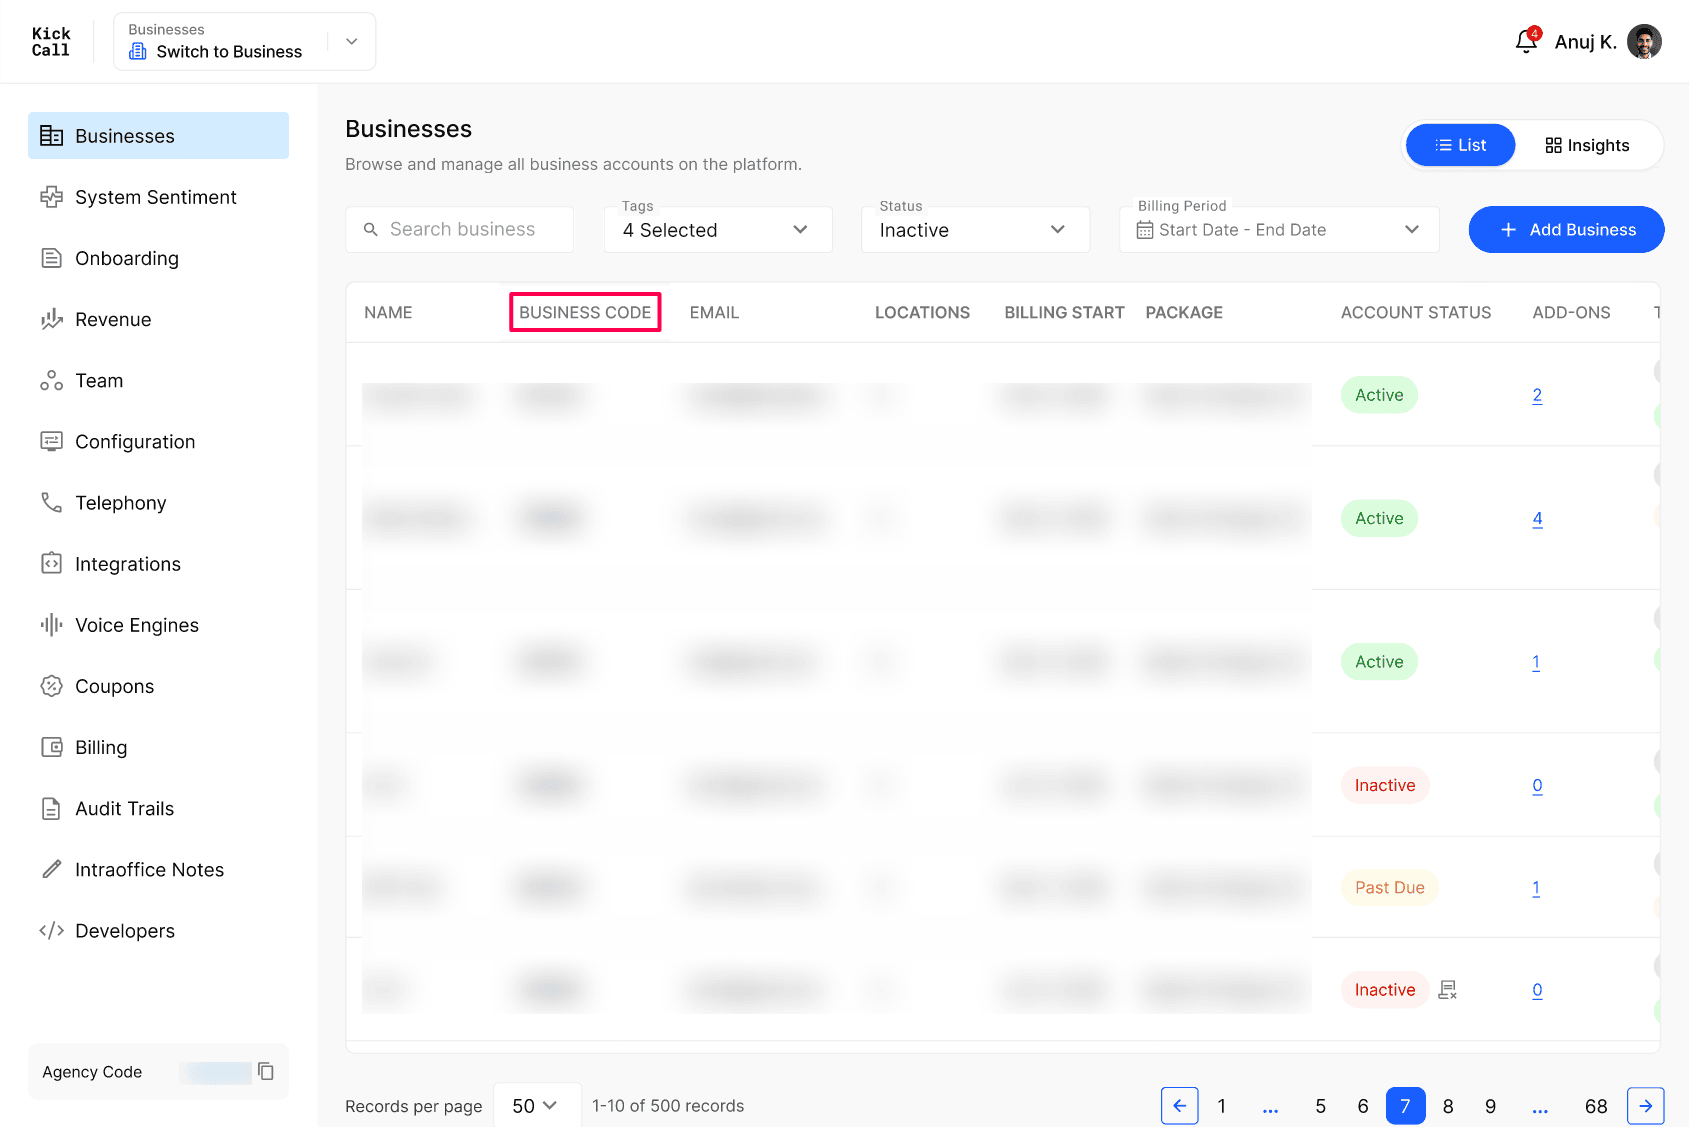
Business Code
The Business Code shown in the second column is a system-generated unique identifier for each business. It never changes and is the safest way to reference a business across teams.
Use the Business Code when:
You raise a support request with the Kickcall team — share the code so we can locate the business instantly.
Your own internal team needs to reference a specific business in tickets, notes or handovers.
Tags
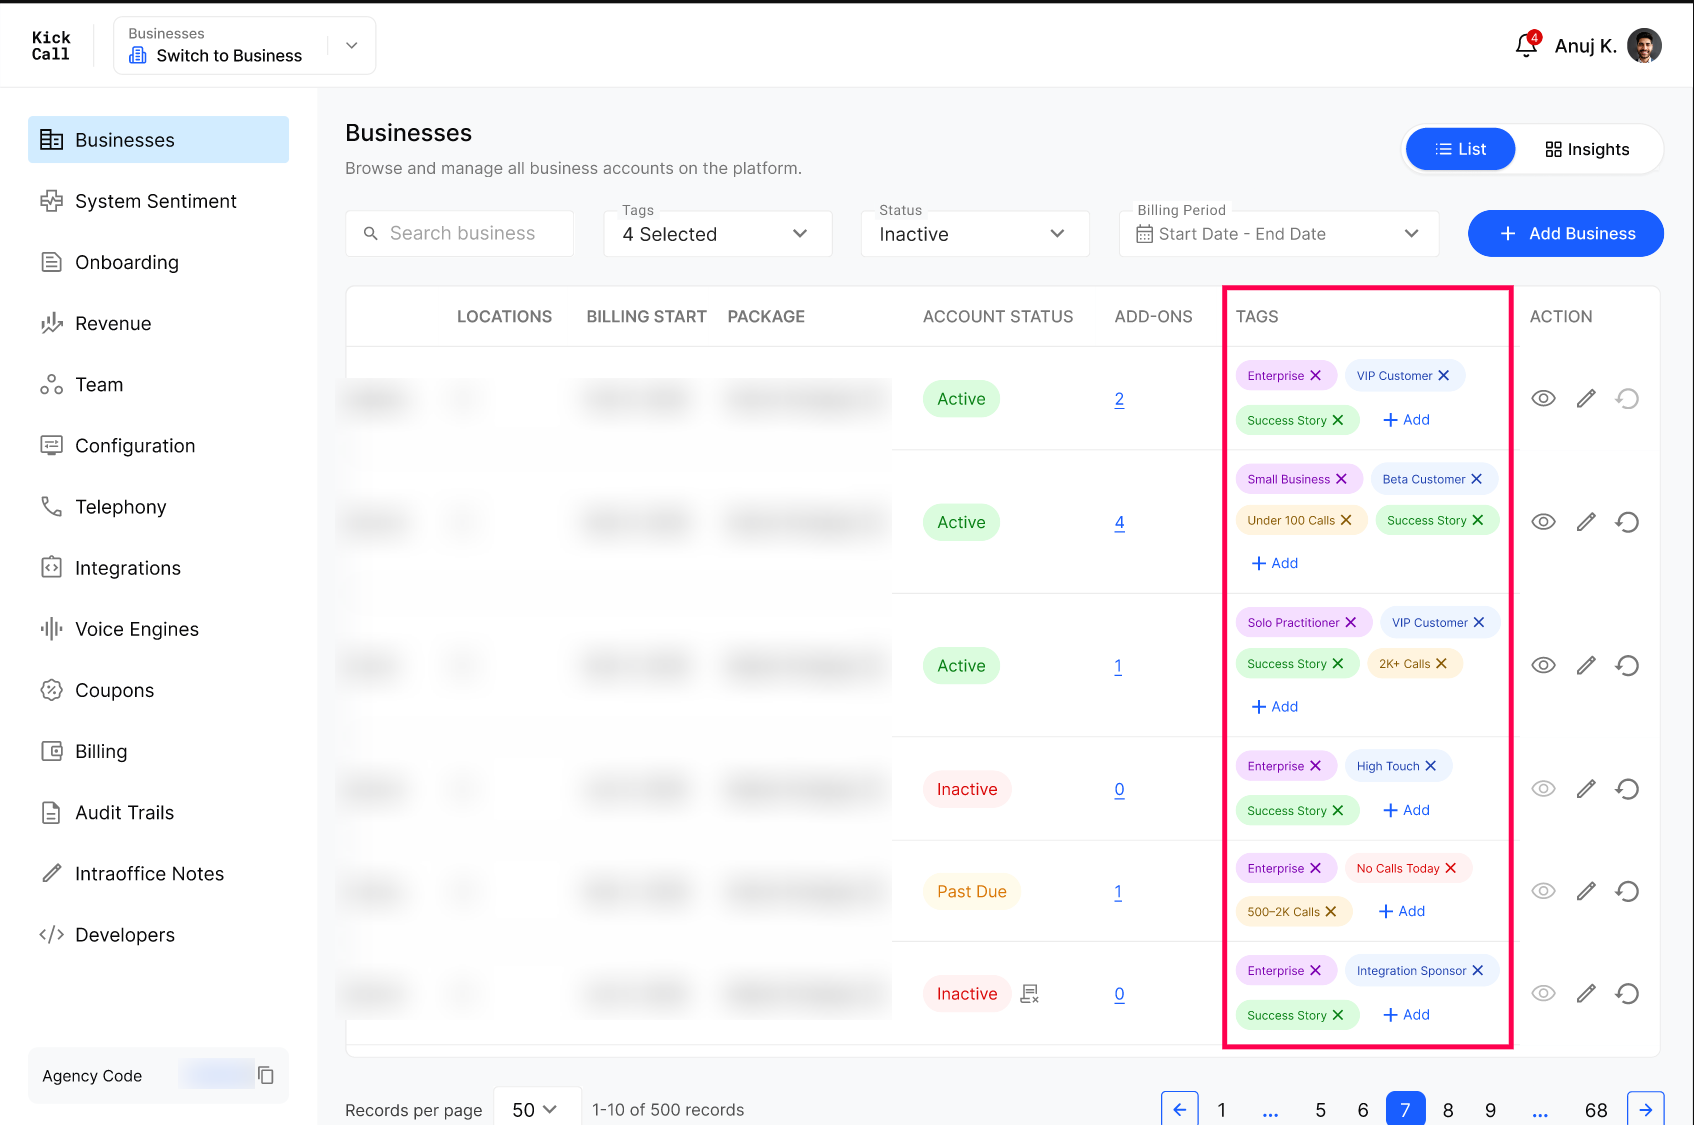
The Tags column lets you label each business so your team can segment the directory the way you work — by risk, by size, by call volume or by how you service the account. Tags are internal to your agency: the business never sees them.
a. Add or remove tags
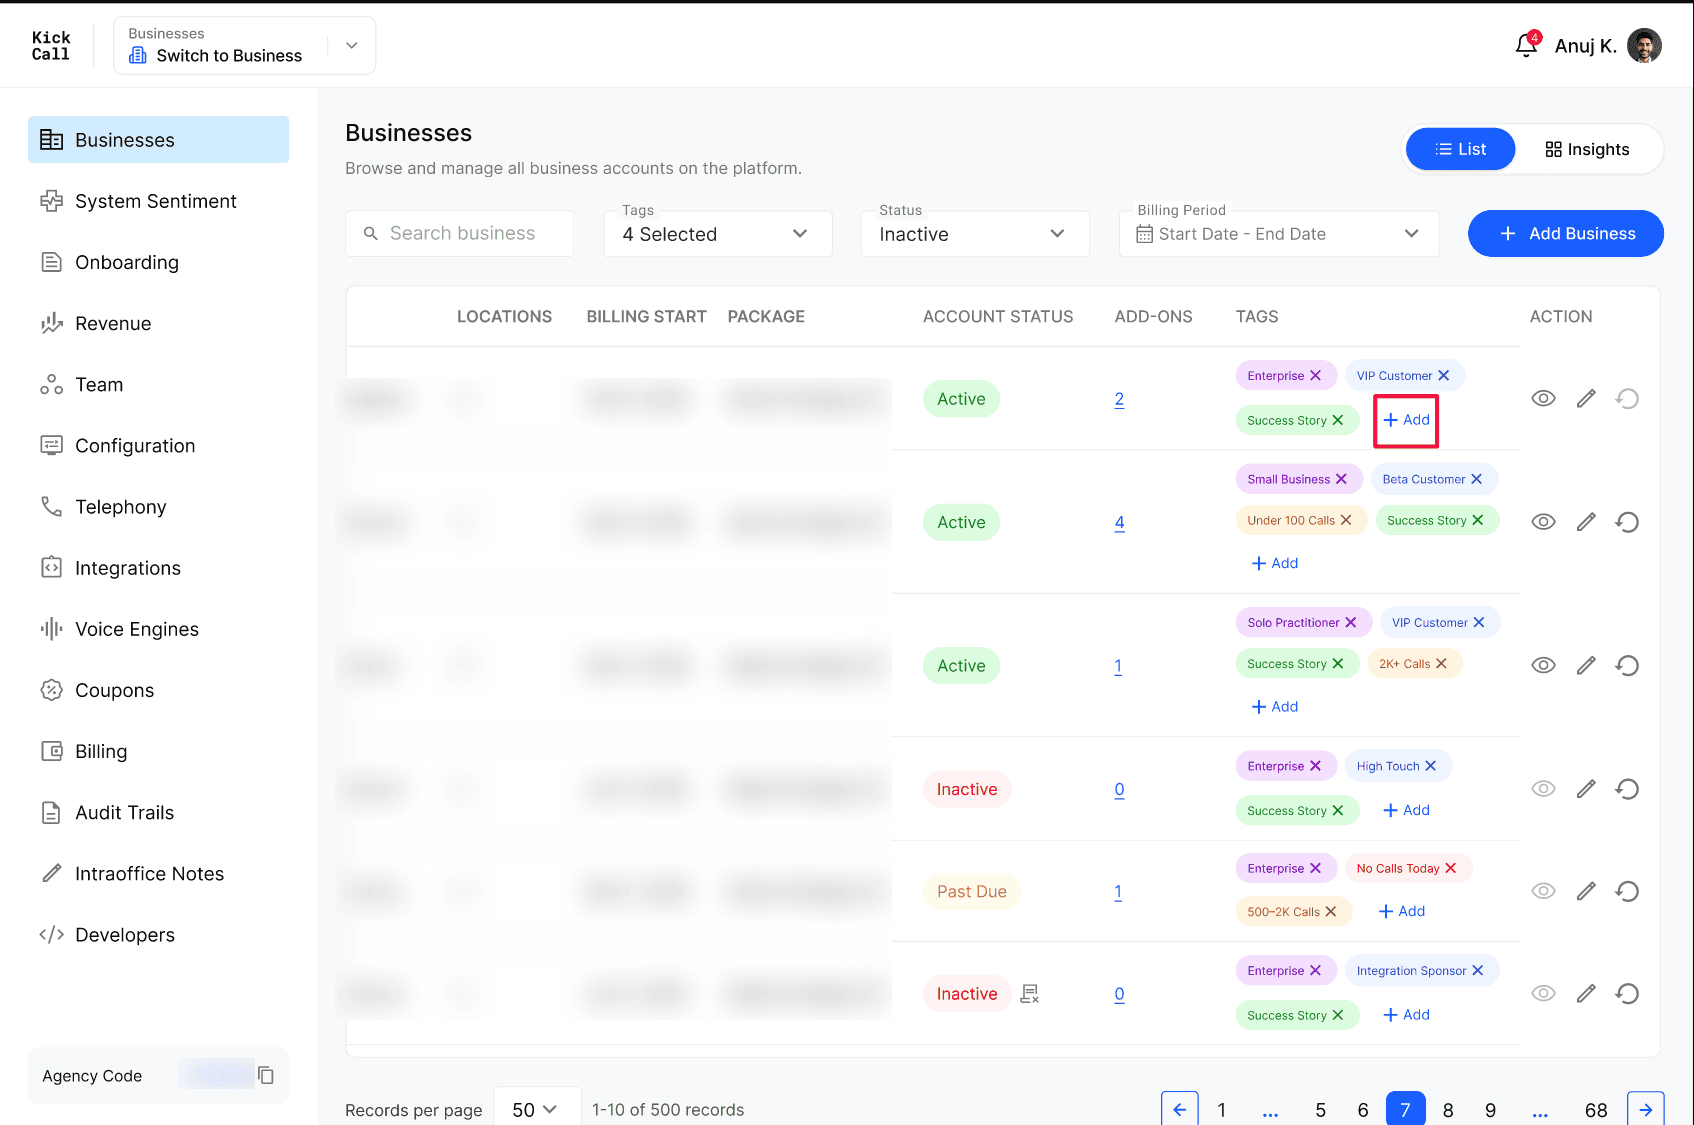
In the Tags column of a row, click + Add. The Add Tags to Business panel opens with the business name pre-filled.
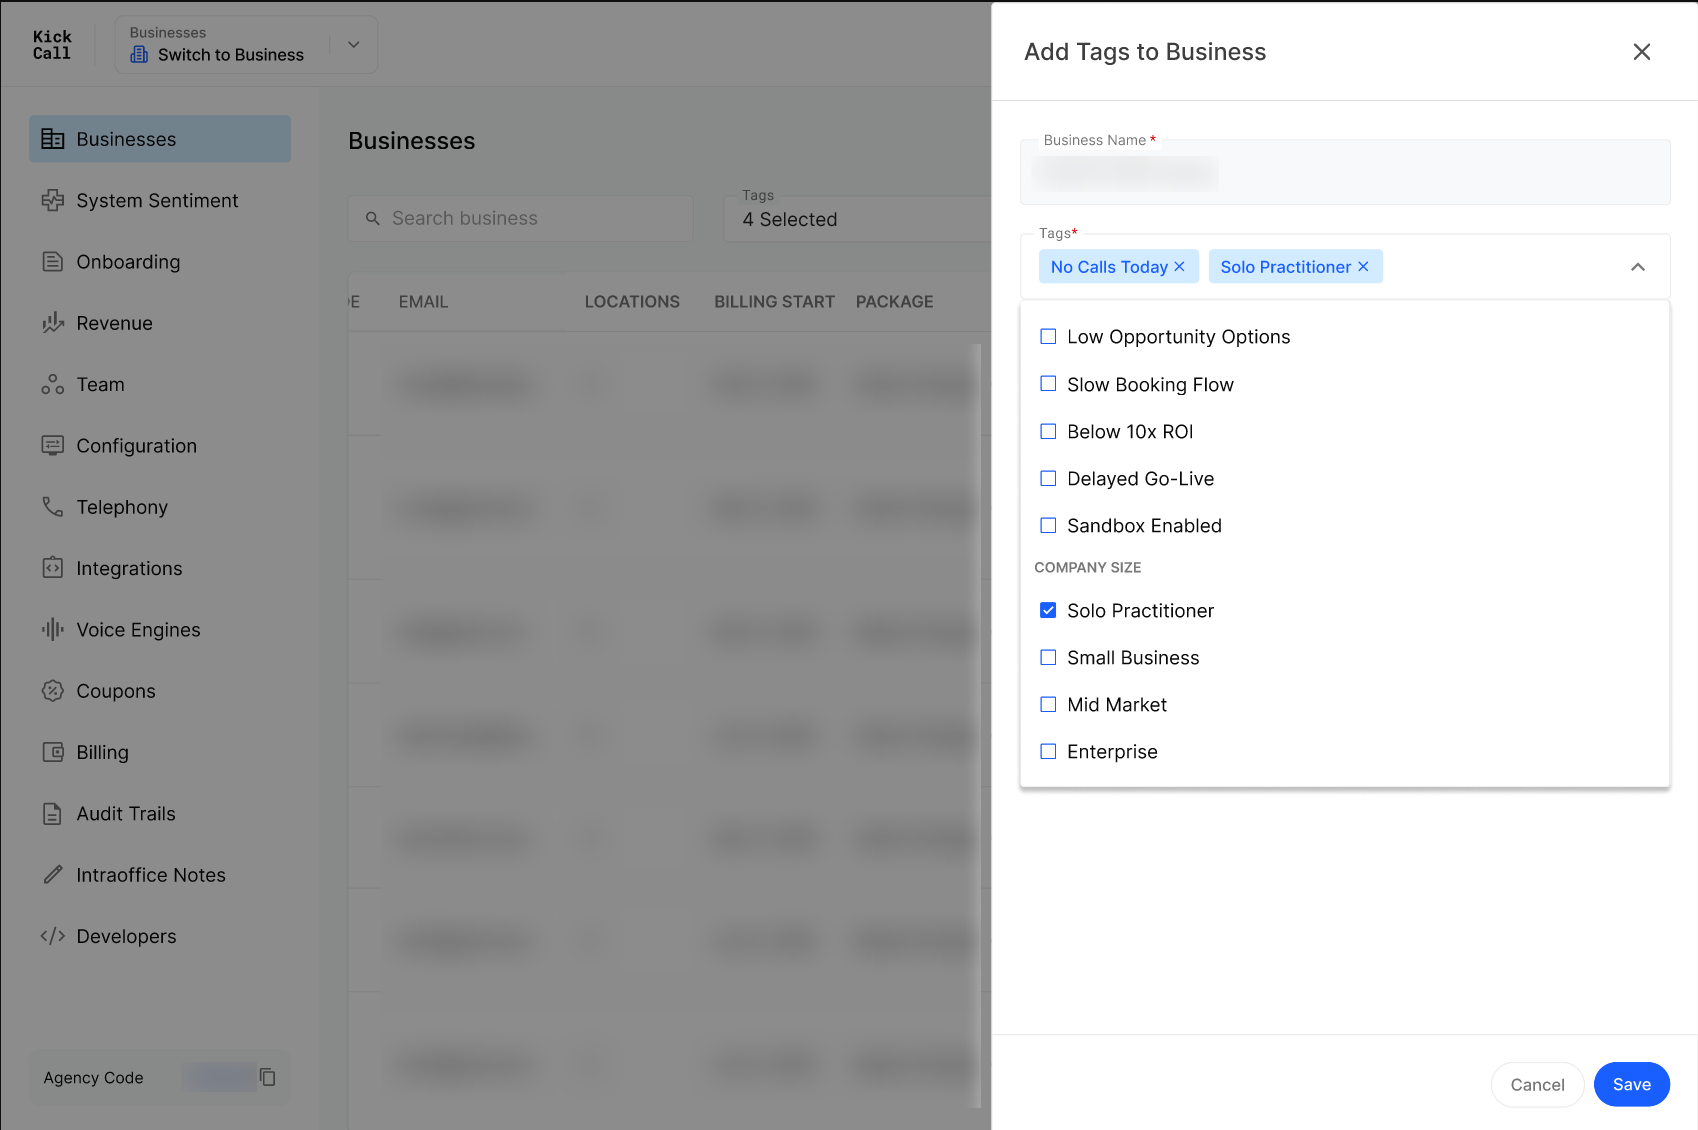
Open the Tags dropdown and tick every tag you want to apply. Selected tags appear as chips at the top of the field.
Remove a tag by clicking the × on its chip — either inside the panel or directly on the row.
Click Save. The tags appear on the row immediately.
b. Tag categories
Tags are grouped into four categories:
Churn Signal — No Calls Today, Short Avg Call Duration, Integration Disconnected, Low Opportunity Options, Slow Booking Flow, Below 10x ROI, Delayed Go-Live, Sandbox Enabled. These mirror the churn signals surfaced in Businesses Insights.
Company Size
Solo Practitioner — A business operated by a single professional or practitioner.
Small Business — A small-sized business with a limited team and customer base.
Mid Market — A growing business with an established team, customer base, and operational needs.
Enterprise — A large organization with complex operations, larger teams, and enterprise-level requirements.
Monthly Call Volume
Under 100 Calls — Business handles fewer than 100 calls per month.
100–500 Calls — Business handles between 100 and 500 calls per month.
500–2K Calls — Business handles between 500 and 2,000 calls per month.
2K+ Calls — Business handles more than 2,000 calls per month.
Customer Success Tags
High Touch — A customer who requires frequent communication, guidance, and proactive support.
Integration Sponsor — A customer who actively supports, promotes, or drives the adoption of an integration.
VIP Customer — A strategically important customer who requires priority attention and support.
Success Story — A customer with notable outcomes or positive results that can potentially be shared as a customer success story.
Low Touch — A customer who can be supported with minimal direct interaction and primarily self-service resources.
Escalated — A customer or account requiring additional attention due to an ongoing issue, concern, or escalation.
Beta Customer — A customer participating in a beta program and providing feedback on pre-release features or functionality.
c. How teams use tags
Filter the list to every business carrying a churn signal and work that queue first.
Separate high-touch and low-touch accounts so success work is distributed correctly.
Pull a list of Beta Customers or Success Stories when you need references or test accounts.
Tip: A business can hold multiple tags across all four categories at once. Keep tagging consistent across your team so the Tags filter stays reliable.
Add-ons column
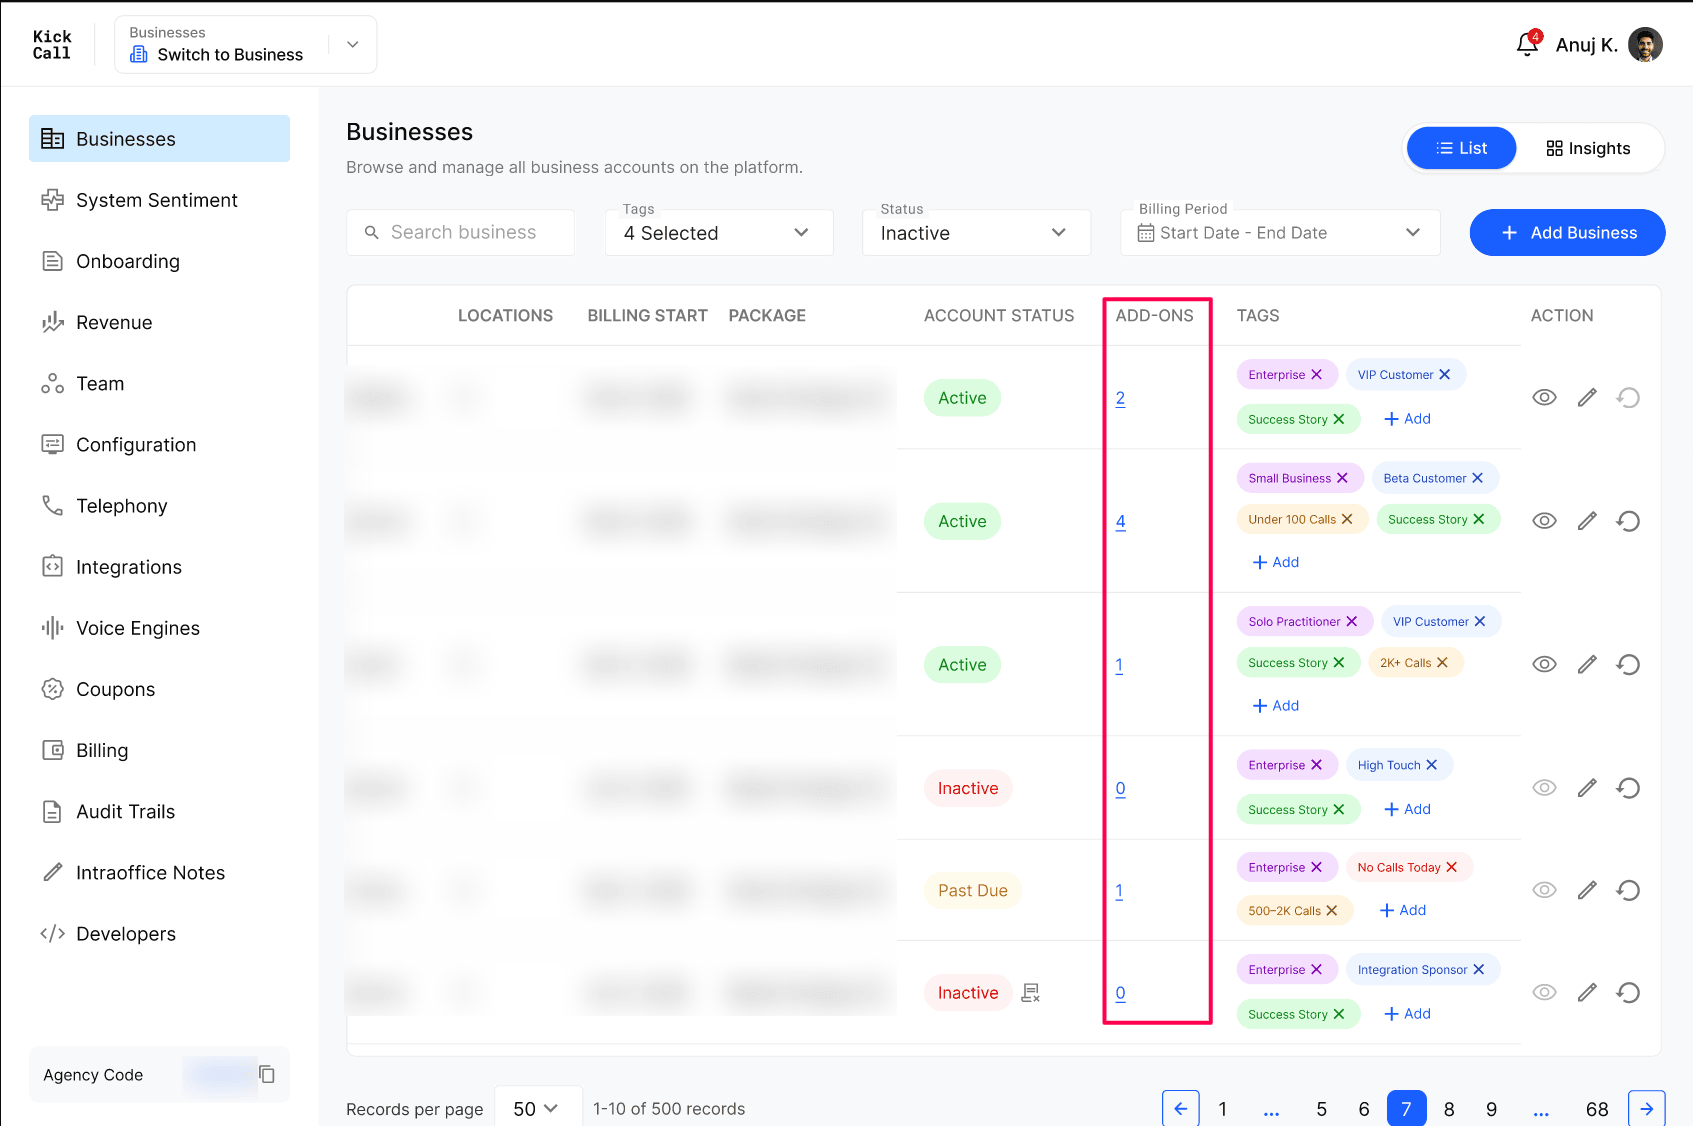
The Add-ons column shows how many active add-ons a business currently has, and gives you a quick way to inspect the full add-on billing history for that account.
a. Reading the column
A number badge (for example, 2 or 4) counts the active add-ons on the business.
0 means no add-ons are currently active.
b. Open Add-Ons History
Click on the no. in the Add-ons column to open the Add-On History panel.
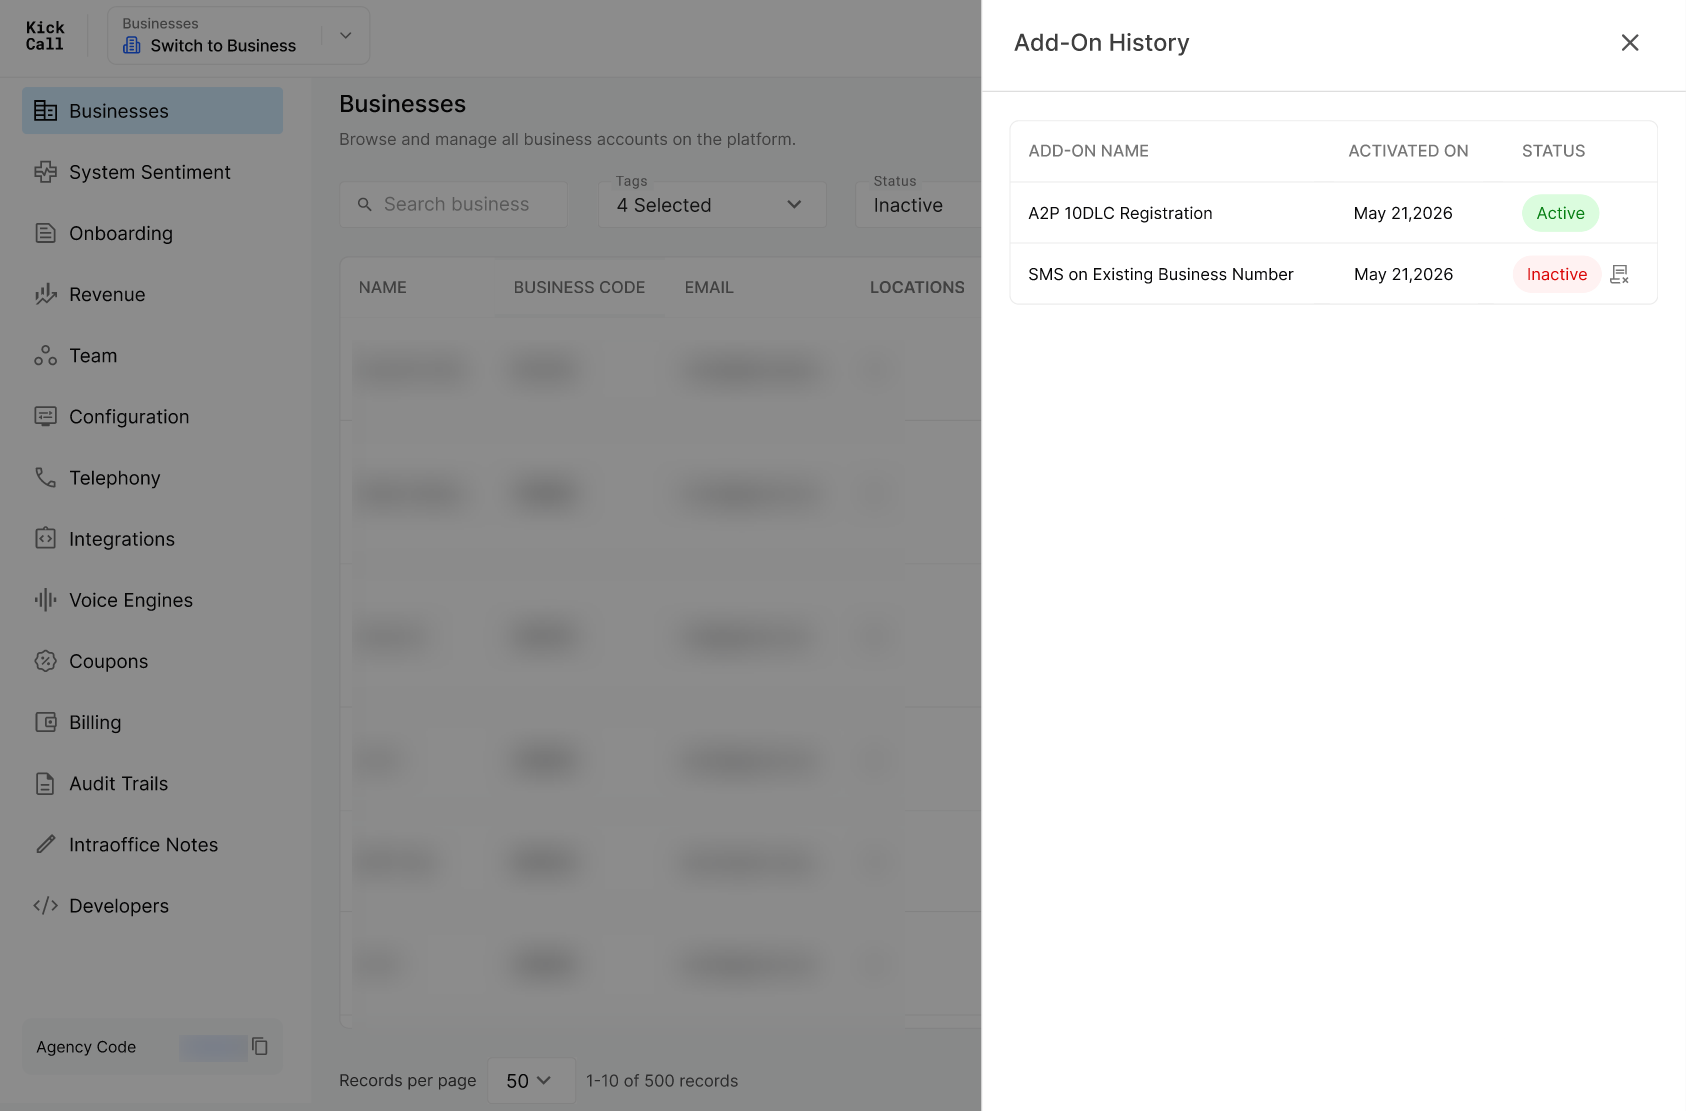
The panel lists every add-on the business has ever activated:
Add-on Name — for example, A2P 10DLC Registration or SMS on Existing Business Number.
Activated On — the date the add-on was first enabled.
Status — Active for currently enabled add-ons, Inactive for add-ons that have been deactivated.
c. View deactivation details
Hover over or click an Inactive status to see why the add-on was turned off.
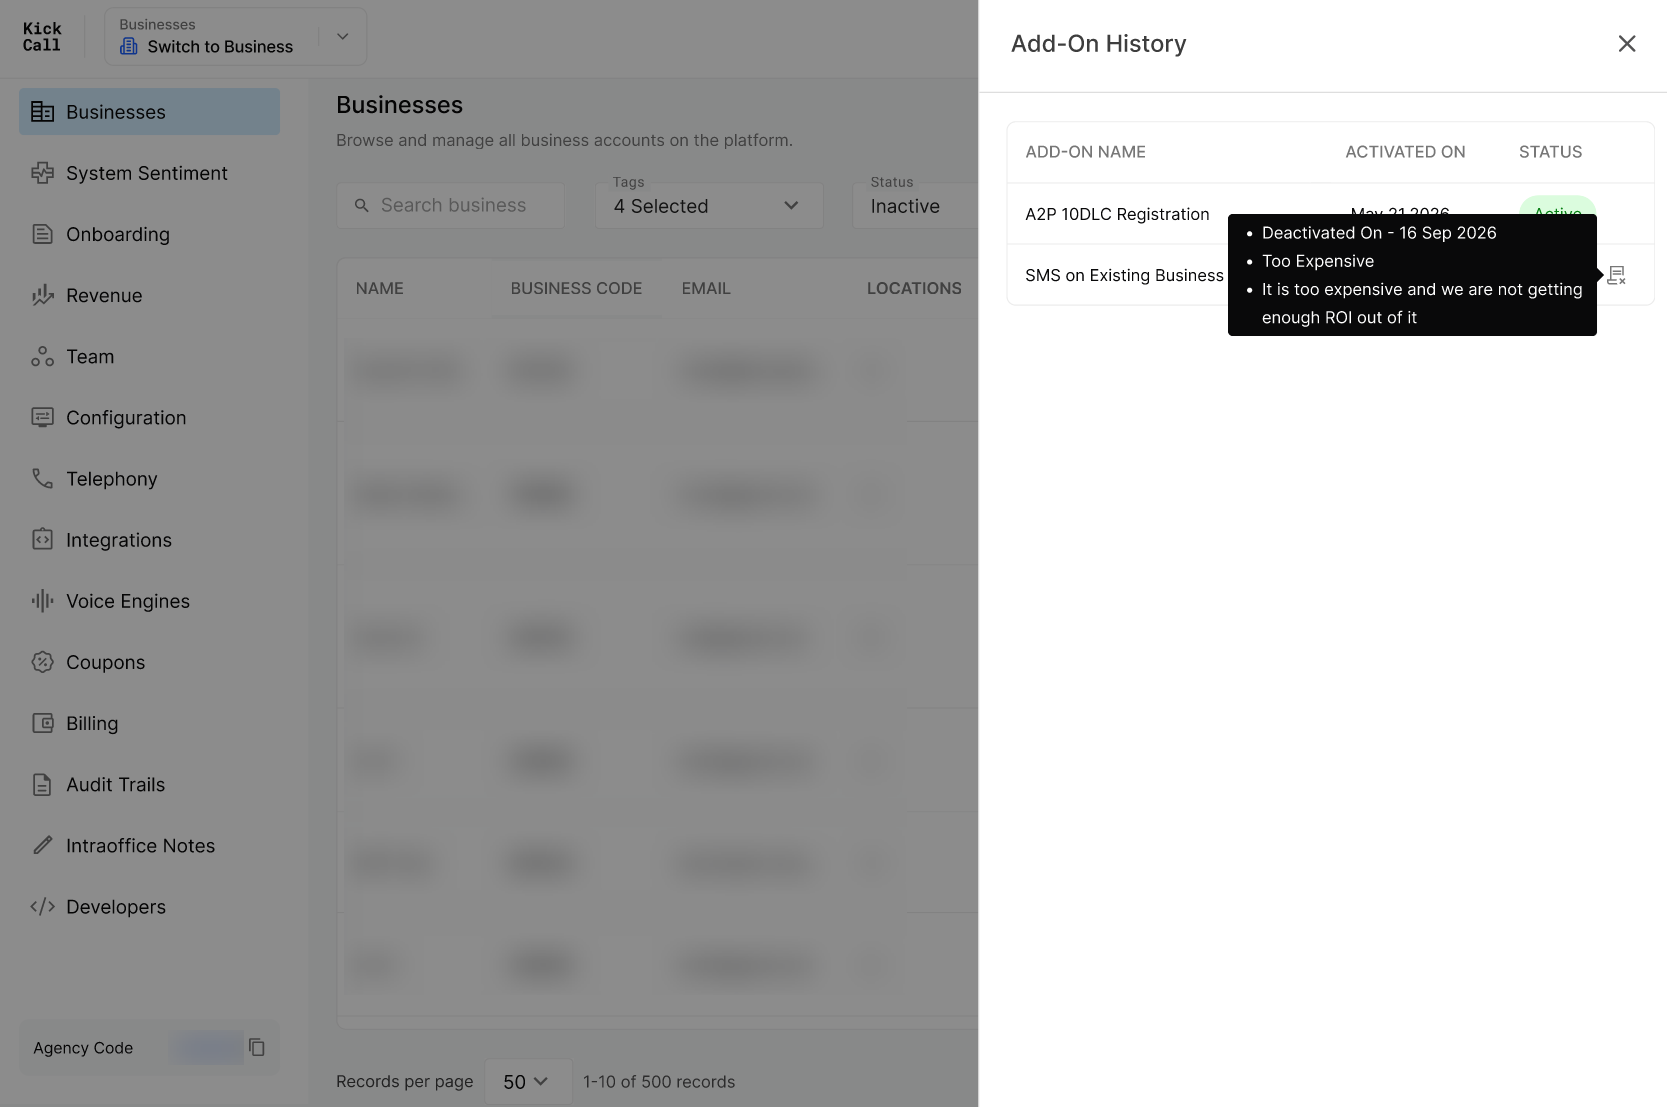
The tooltip shows:
Deactivated On — the date the business cancelled the add-on.
Cancellation reason — the option selected from the dropdown while cancellation (for example, Too Expensive).
Cancellation feedback — any comment the business entered explaining the decision.
Note: Add-ons are managed and billed through the Business Portal. The agency view is read-only and is intended for support and account-management context.
Row actions
Each row has three quick action icons on the right:
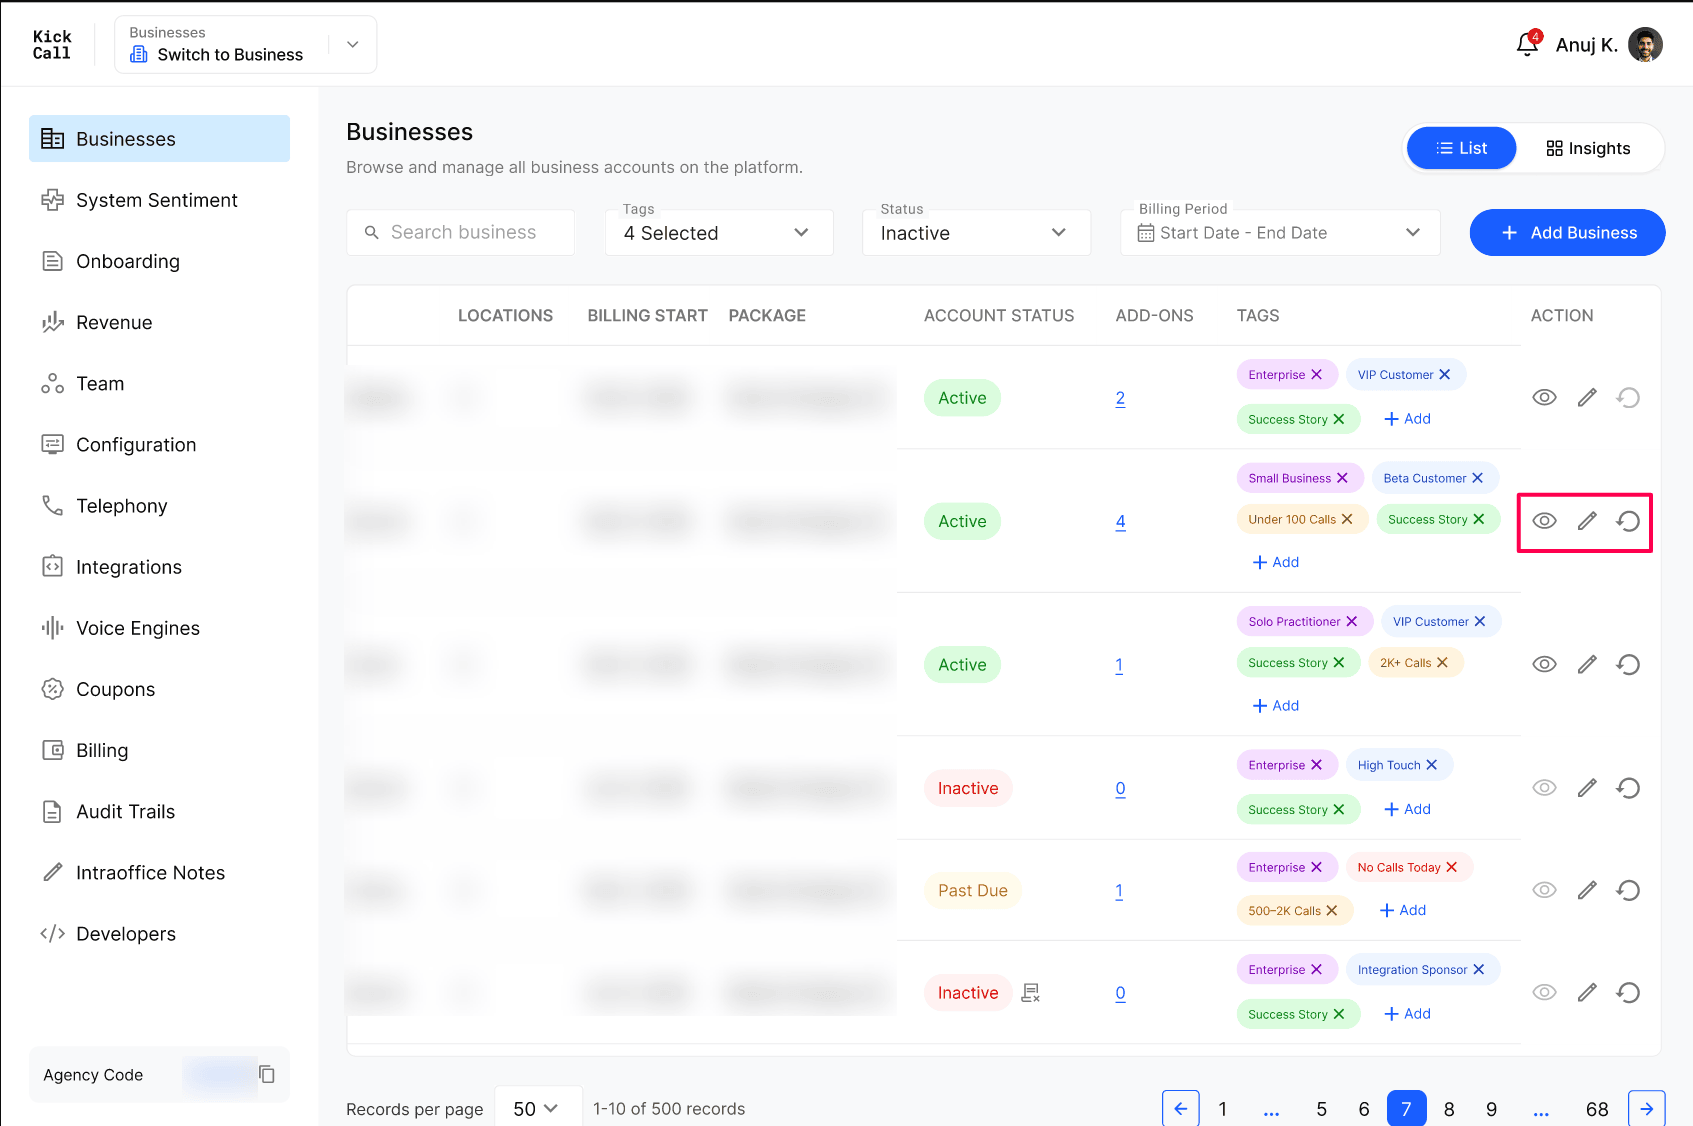
a. View (eye icon) — Impersonate
Clicking View impersonates the business and jumps you directly into the Business Portal for that account. You see exactly what the business owner sees and can troubleshoot from their point of view.
Note: Every impersonation is recorded inside that business's Audit Trails, so the business and your team always have a record of who accessed the account and when.
b. Edit (pencil icon)
Clicking Edit opens the business detail page where you can change the business's profile and configuration — name, contact details, locations, agents, integrations and more. See Manage Business Details & Configurations for the full walkthrough.
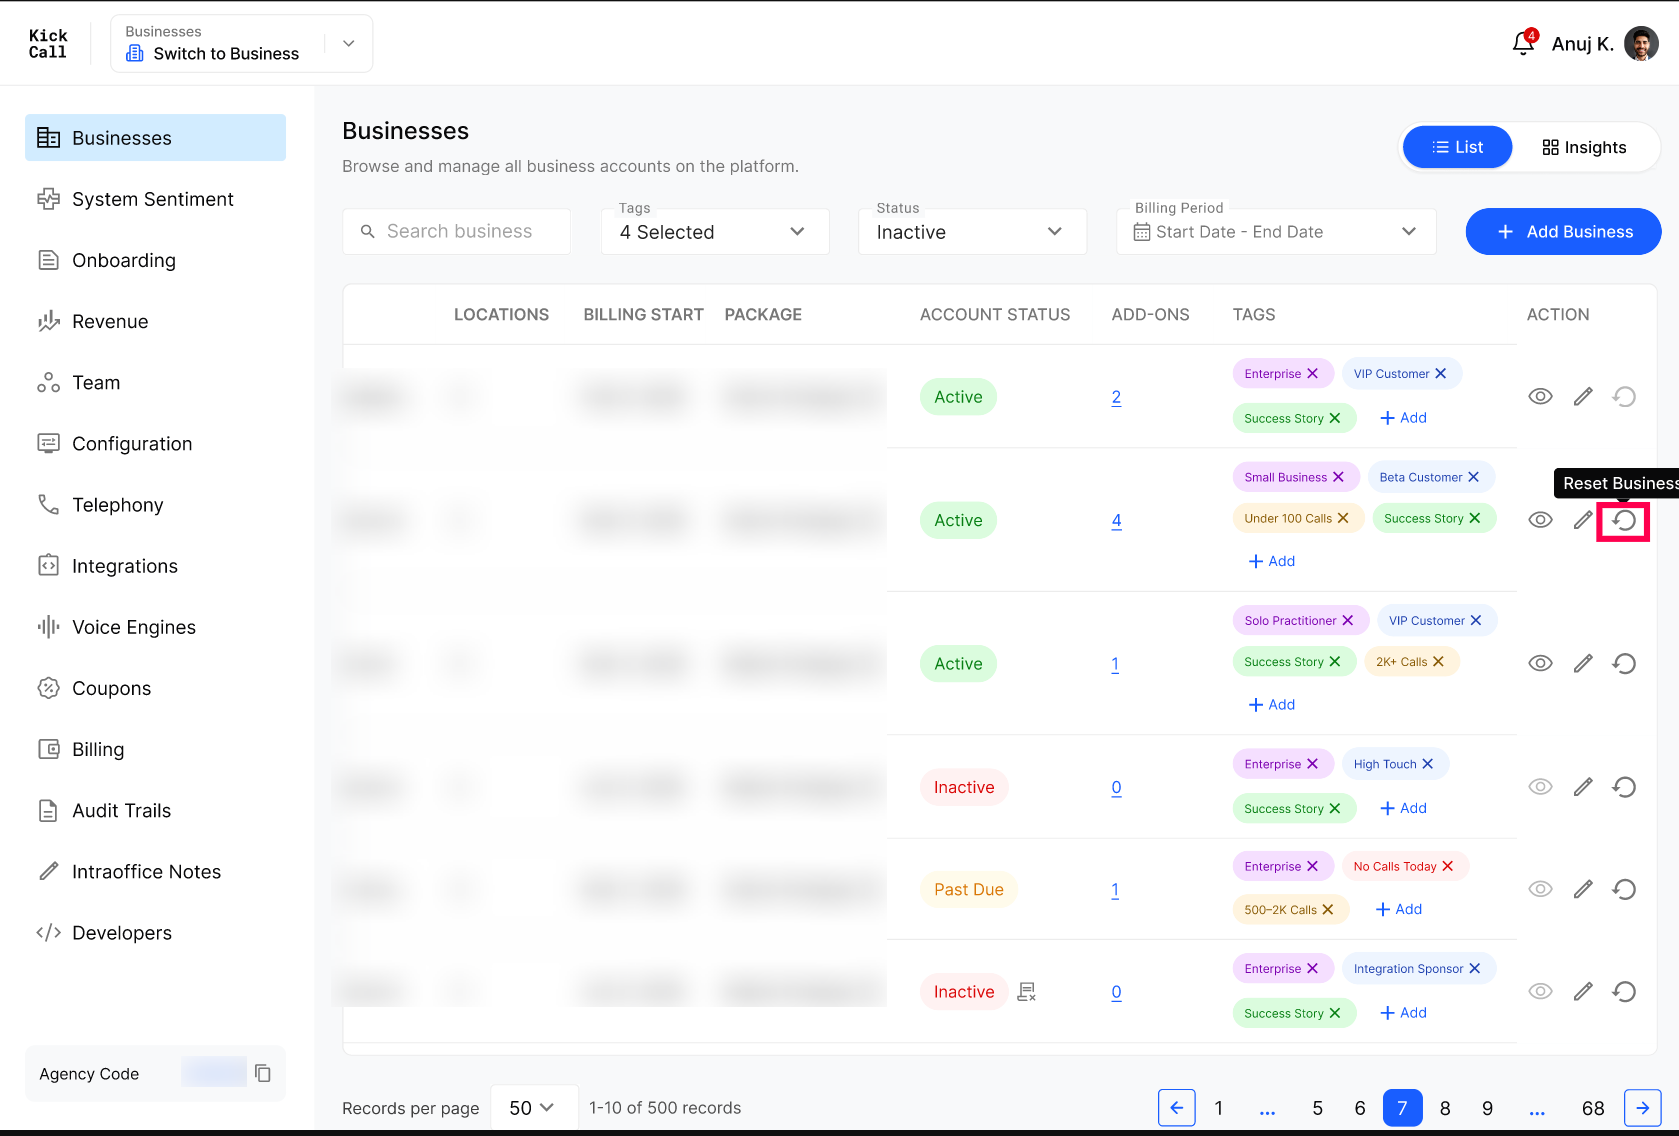
c. Reset & Start Billing (circular arrow icon)
Use Reset & Start Billing right before delivering the AI agent to a business and before they go live. This action clears all test activity from the account so the business starts with a clean workspace, and it marks the official start of billing for that business.
When you click Reset, a confirmation modal opens explaining what will be cleared:
Call logs, worksheets, and recordings created during testing
Configuration change history
AI governance and compliance logs
To confirm, type the business name in the Business name field and click Reset & Start Billing.
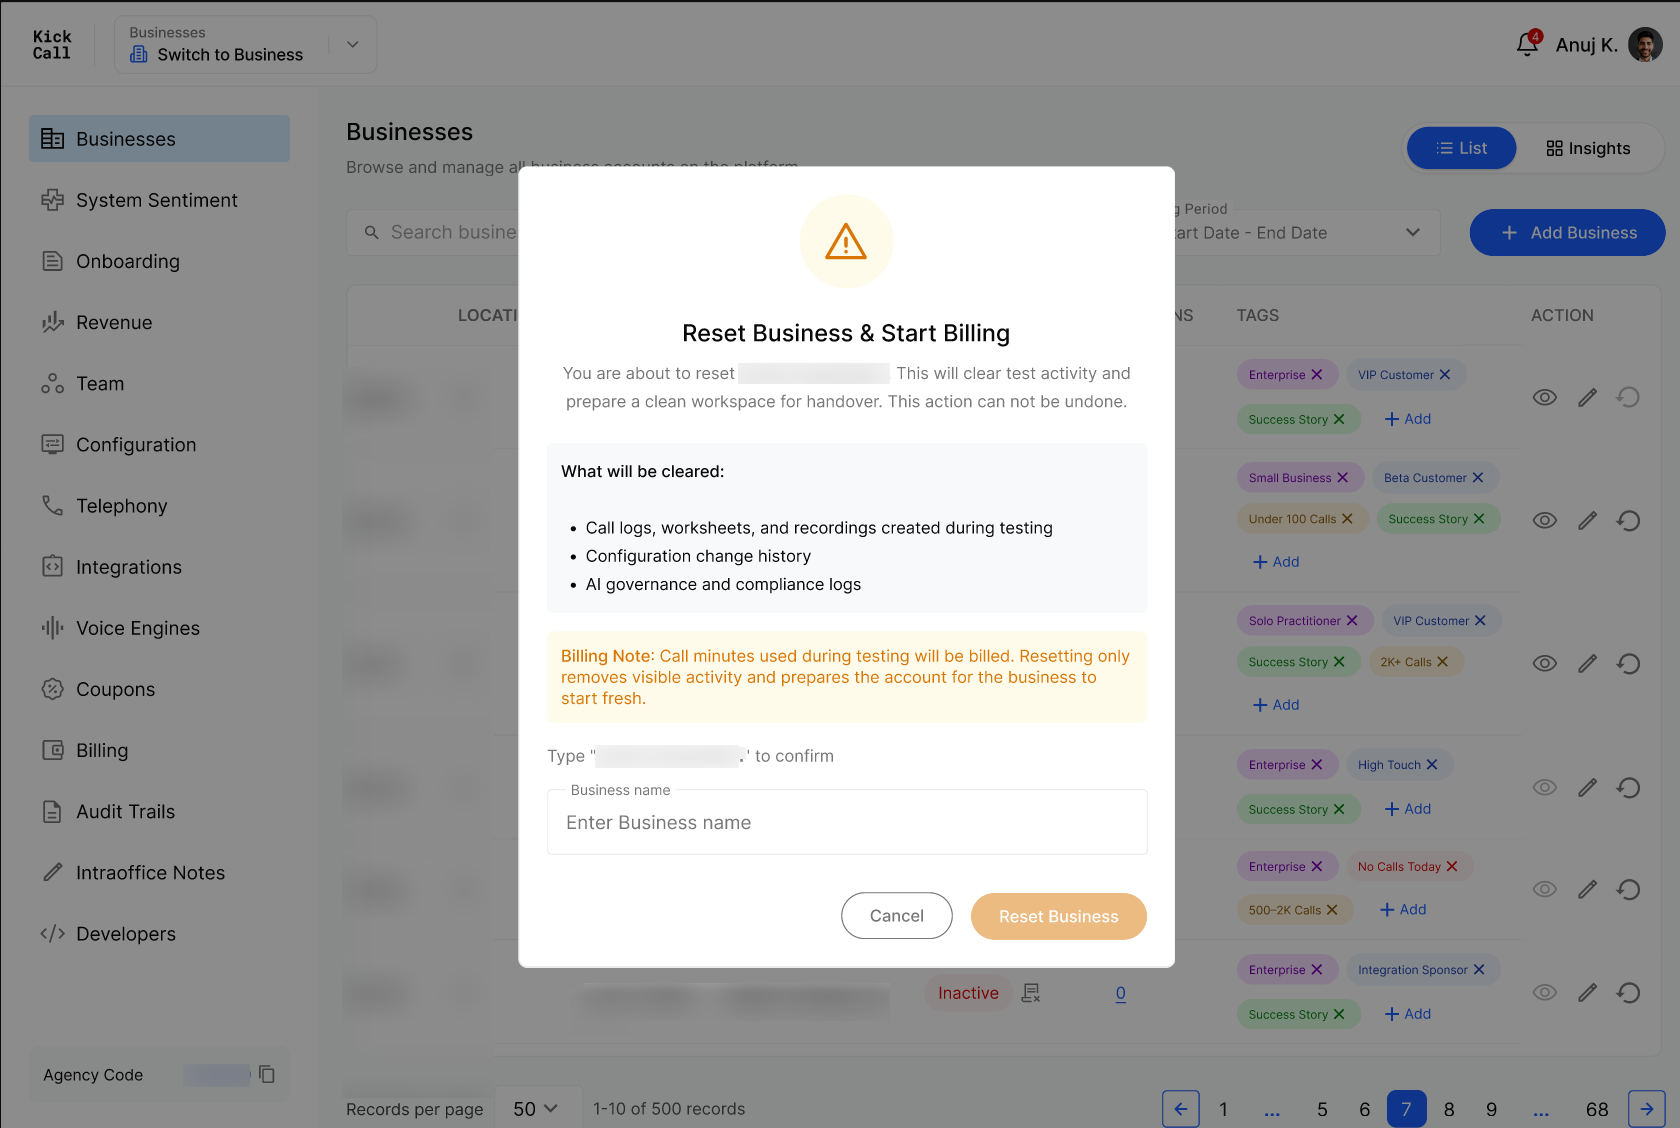
Important: A business can be reset only once. After it has been reset, the action becomes non-editable (the icon is disabled) and cannot be triggered again. This action cannot be undone.
Billing note: Call minutes used during testing will still be billed to the Agency. Reset only removes the visible activity to prepare the account for handover — it does not reverse usage charges. From the moment you click Reset & Start Billing, the business's billing cycle officially begins.
View cancellation reason and feedback
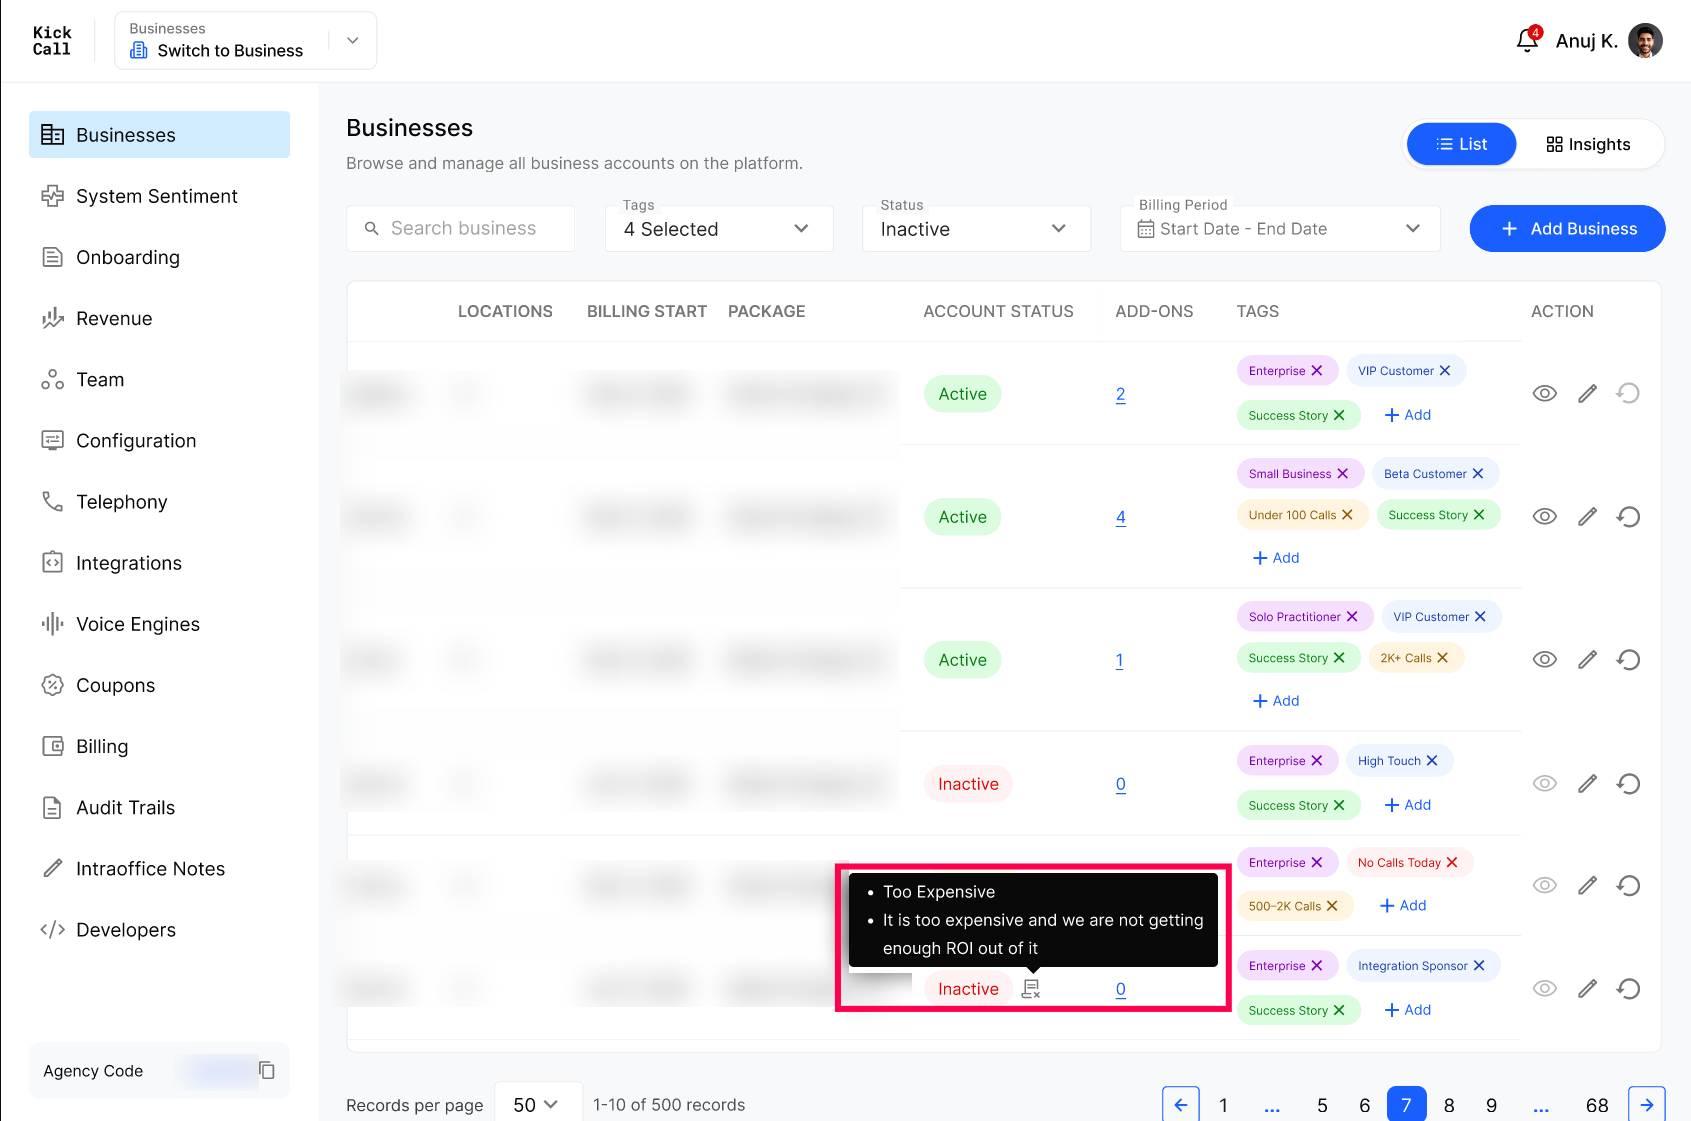
When a business cancels its own subscription, a cancellation-reason icon appears on the business row in the All Businesses list. This gives your team immediate context on why the business left without having to open the account.
a. What the icon shows
Hover over or click the icon to see:
Cancellation reason — the option the business selected when cancelling (for example, Too Expensive).
Cancellation feedback — any free-text comment the business entered explaining the decision.
b. Where the information comes from
The reason and feedback are collected from the cancellation flow in the Business Portal. When a business owner chooses to cancel, they select a reason from the dropdown and can add additional feedback before confirming. That same data is then surfaced on the agency side.
Note: The cancellation-reason icon only appears when a business cancels its subscription directly. It is not shown for accounts that were set to Inactive or Archived by an agency user, or for accounts that became inactive due to billing failure.