How Do You Find Callers and Review Their Conversations in Kickcall?
Find a caller, review associated conversations, and manage VIP contacts in Kickcall.
Written By Maruf Ansari
Last updated 6 days ago
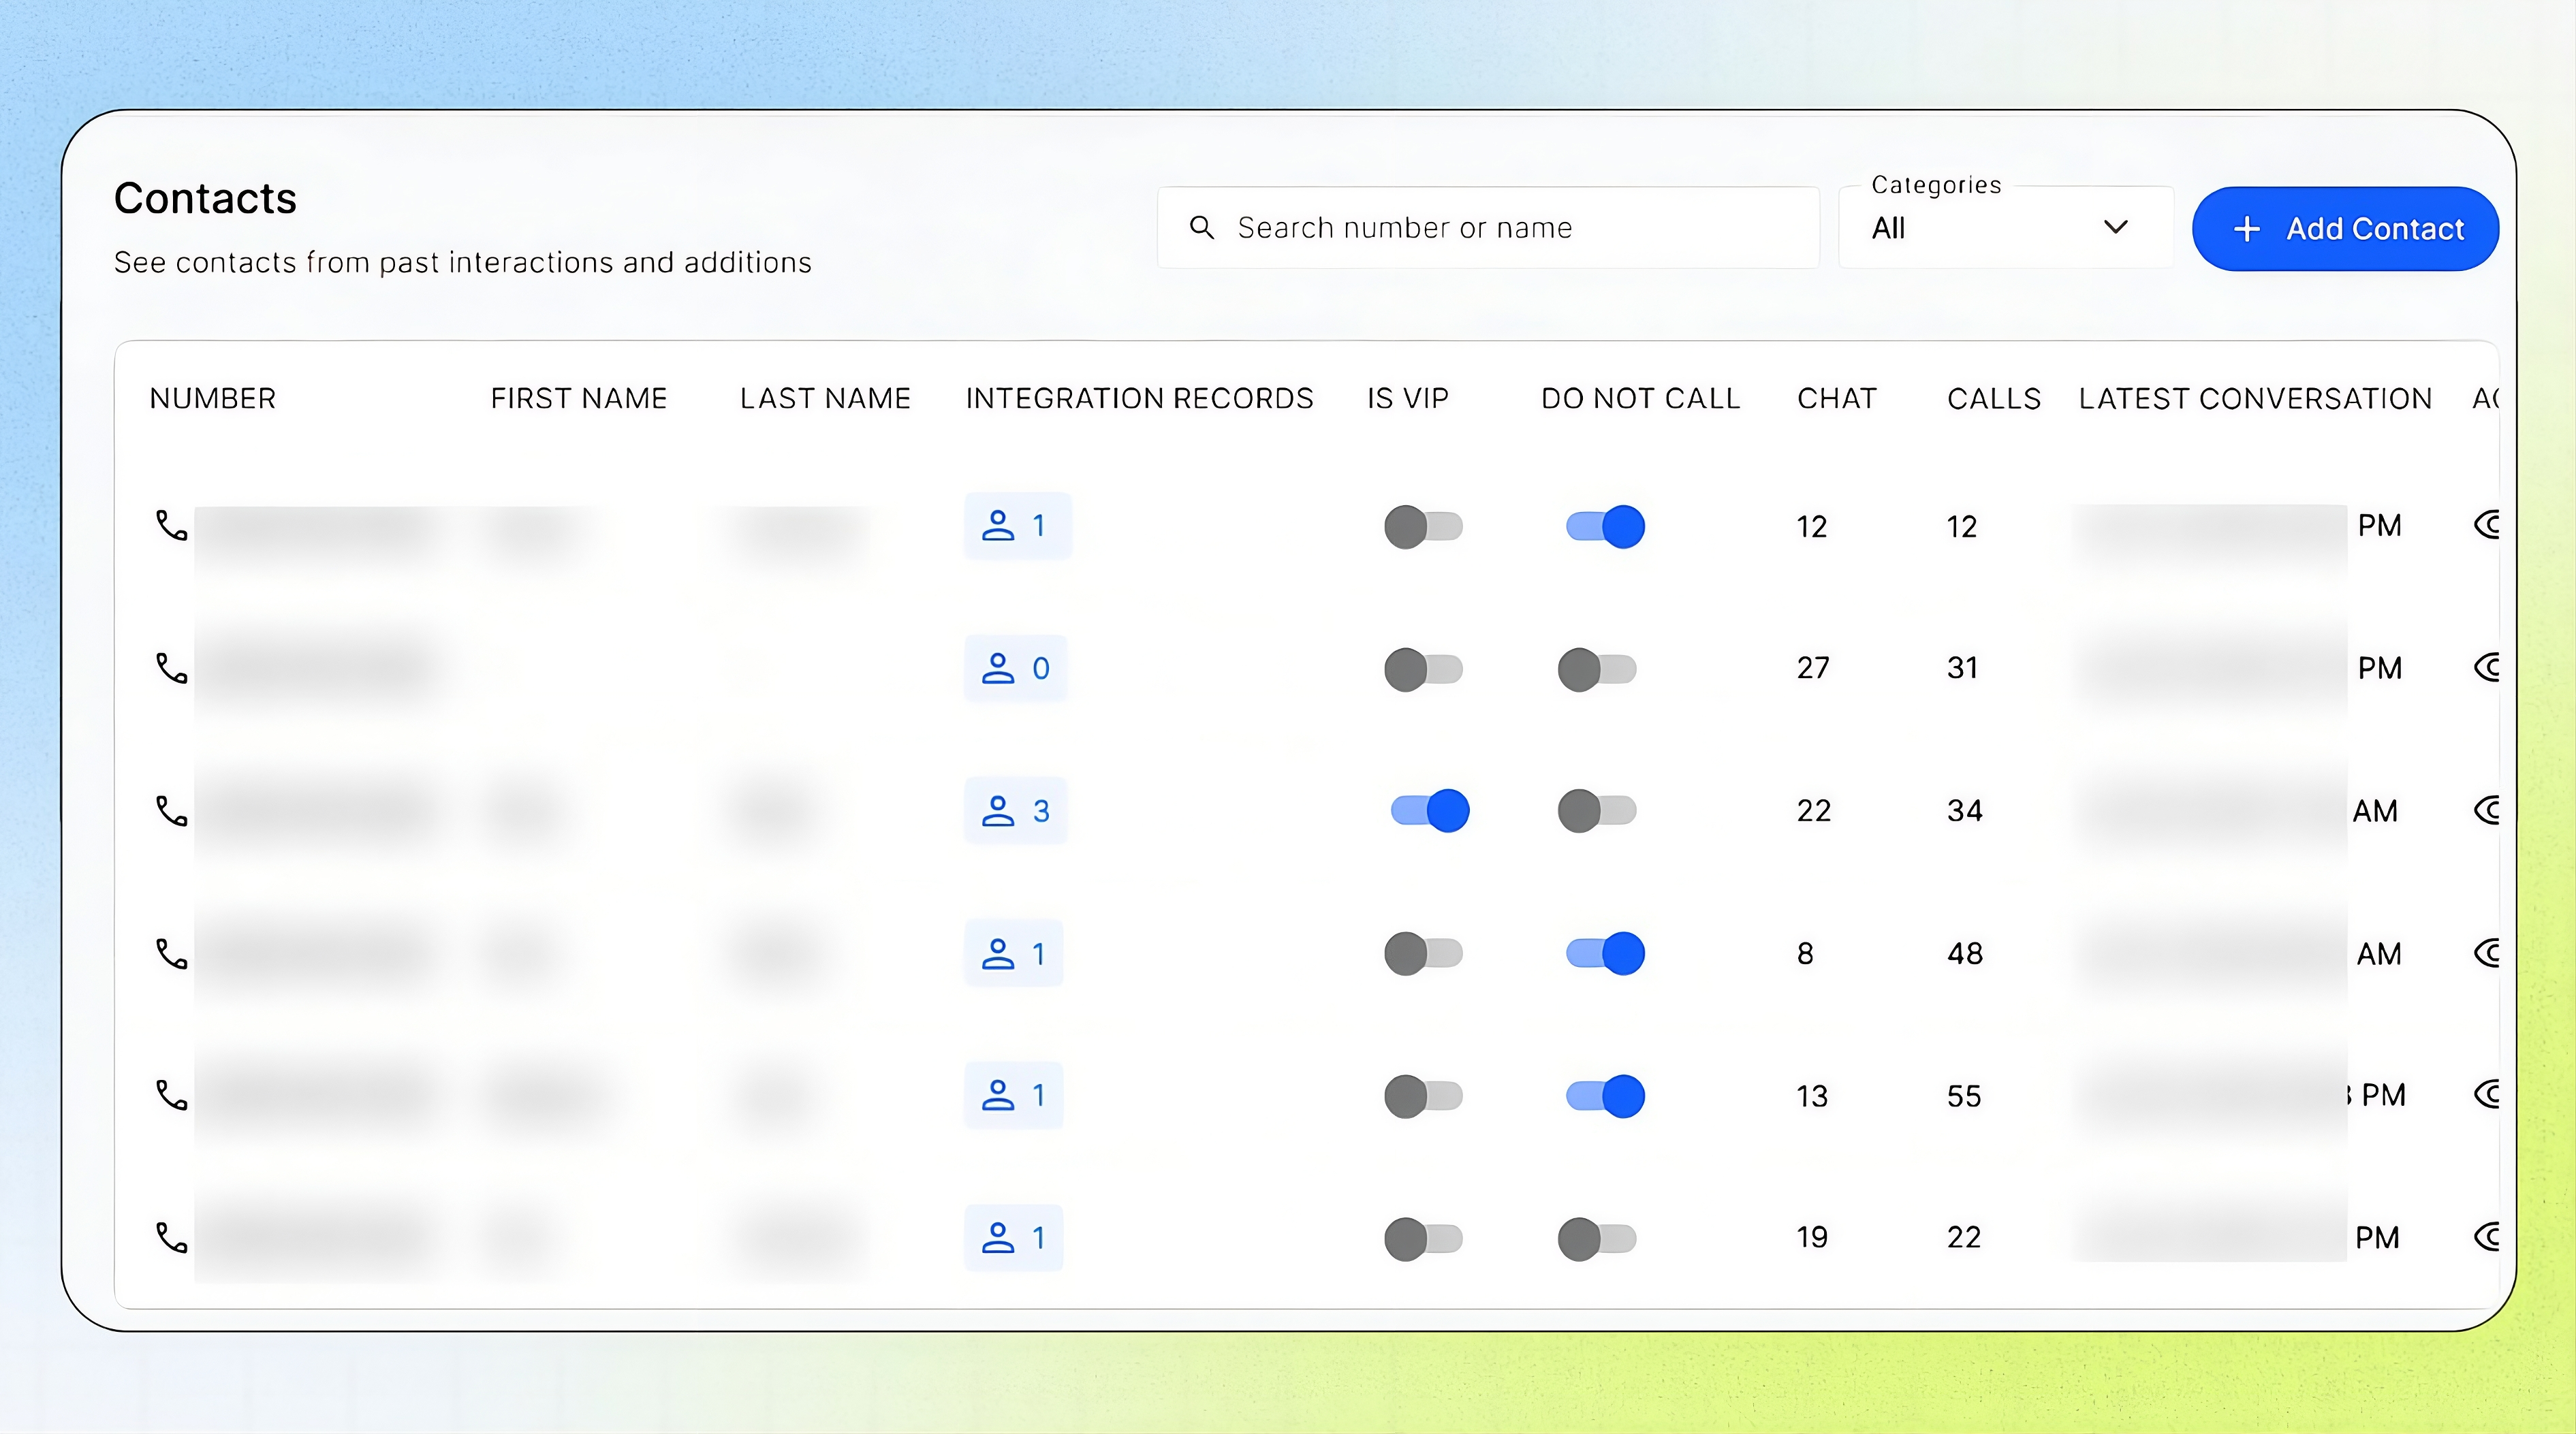
Know who's calling before you pick up the history. Contacts lists every phone number that has reached your Business by call, web chat or SMS, with its full conversation history in one place. Use it to flag important callers as VIPs, block outgoing calls to specific numbers, and review past calls and chats quickly.
Contacts Overview
Contacts allows Business users to manage and review the people who interact with their AI Agent. Contacts are created automatically when a phone number calls or chats with the AI Agent, and you can also add contacts manually. For each contact, you can review caller details, matched integration records, conversation history, signals, notes, transcripts, and recordings. You can mark important callers as VIPs, enable Do Not Call to block outgoing calls to specific numbers, and add notes to help your team manage future conversations and follow-ups.
Important notes
Contacts can be created automatically from calls, web chat, and SMS.
Contacts are matched by phone number. Several people sharing a number are all linked to it.
A number without a matched contact record appears as Unknown Caller.
Every new number starts with Is VIP and Do Not Call off.
Do Not Call blocks outgoing calls to the number. Use it for callers who have asked not to be called.
A manually added contact starts building conversation history after its first call or chat.
Before you start
Make sure you have:
Access to the Business Portal.
A caller’s phone number or name if you are searching for a specific contact.
Permission to view contact and conversation information.
A clear reason for reviewing or updating the contact.
Treat phone numbers, transcripts, recordings, notes, and associated records as sensitive business information.
Find a contact
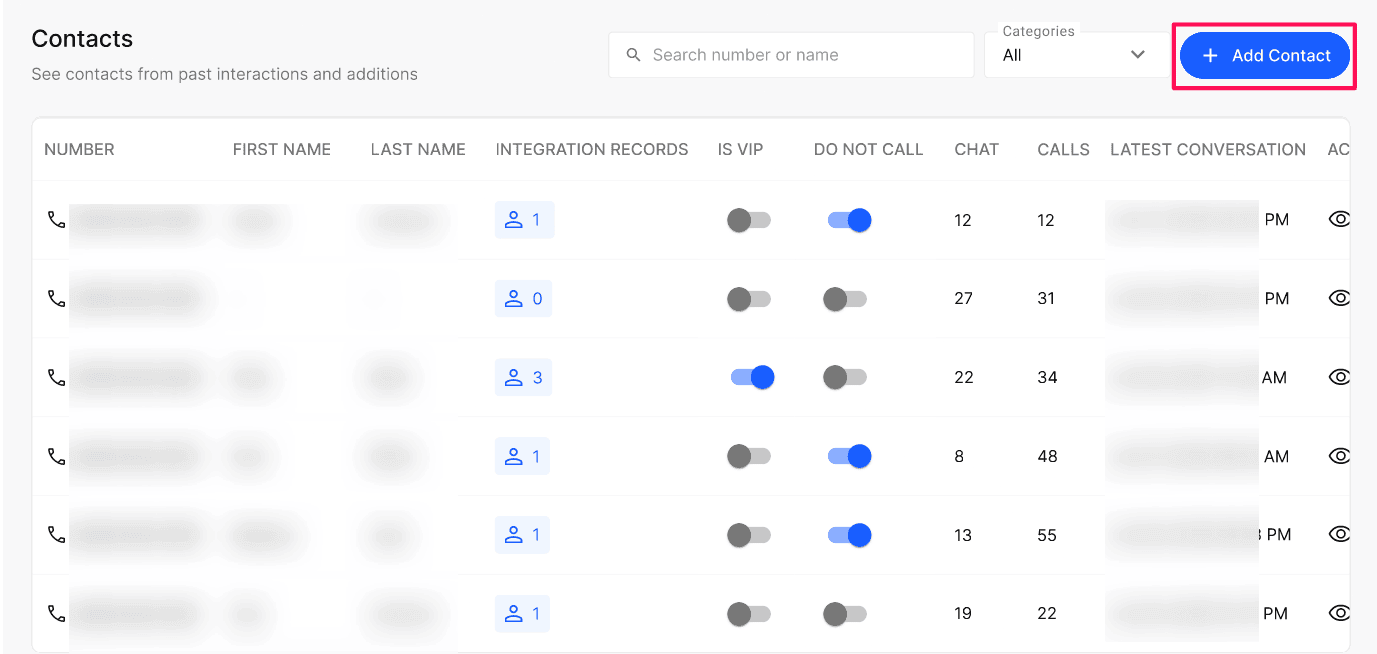
Open the Business Portal. Open Contacts.
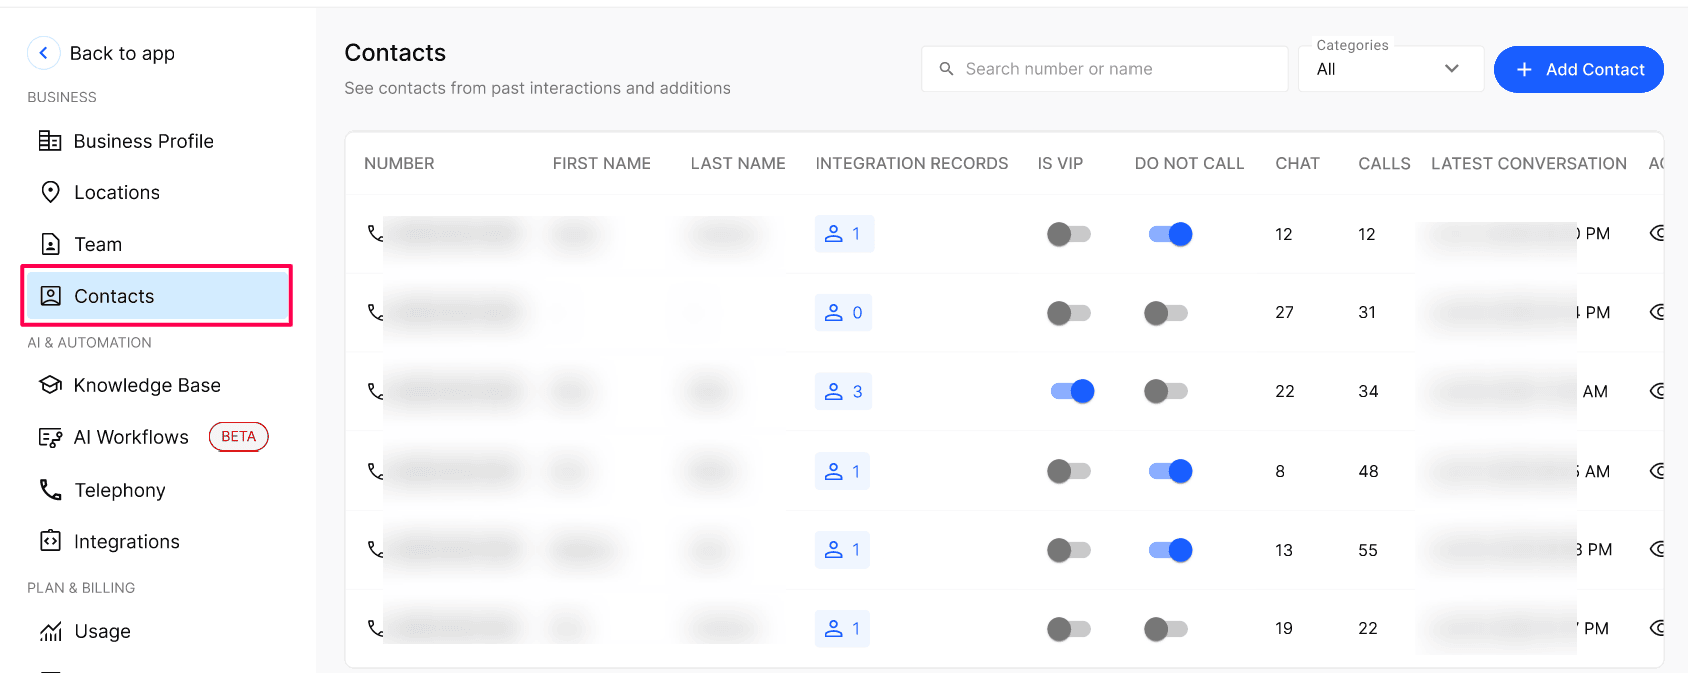
Enter a phone number or name in Search number or name.
To show only important callers, open the Categories dropdown. Select All or VIP.
Select the eye icon in the contact’s row to open the full detail view.
Mark a contact as VIP
Open Contacts. Find the contact you want to prioritize.
Turn on the Is VIP toggle.
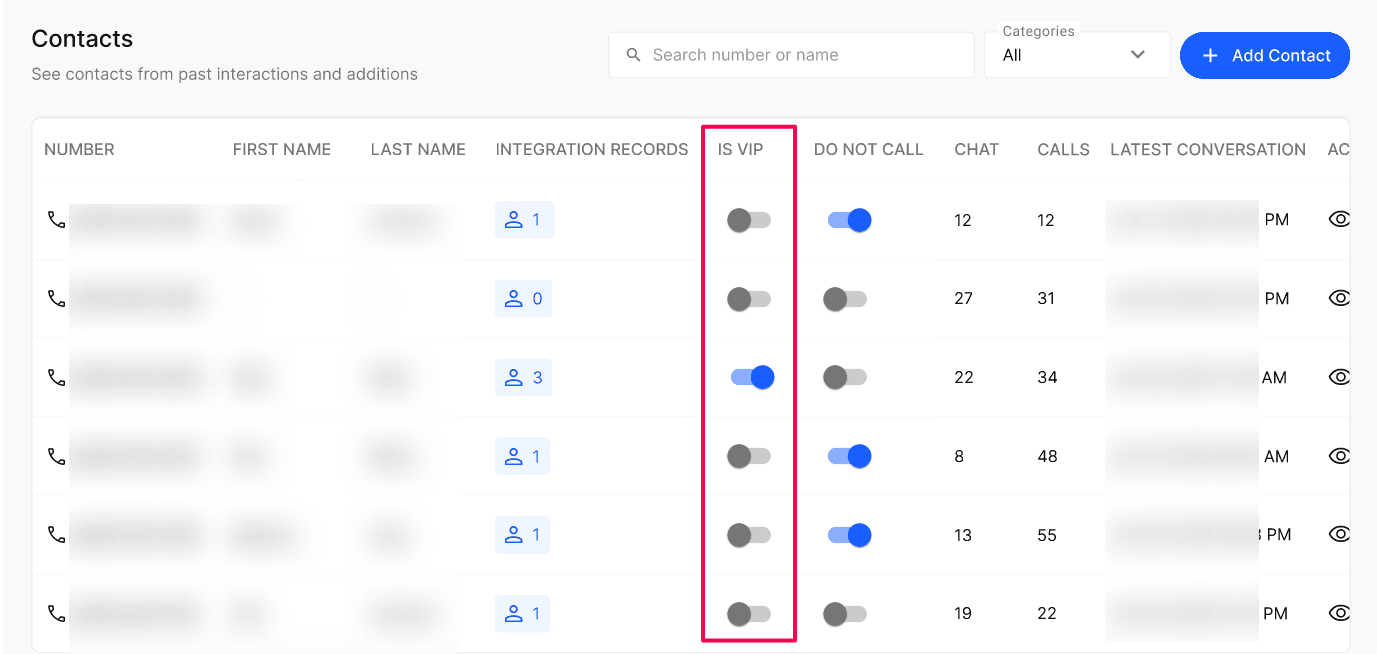
Use the VIP category filter later to find the contact quickly.
The change saves immediately. To remove the VIP status, turn the toggle off.
Block outgoing calls to a contact
Turn on the Do Not Call toggle on the contact's row. It saves immediately.
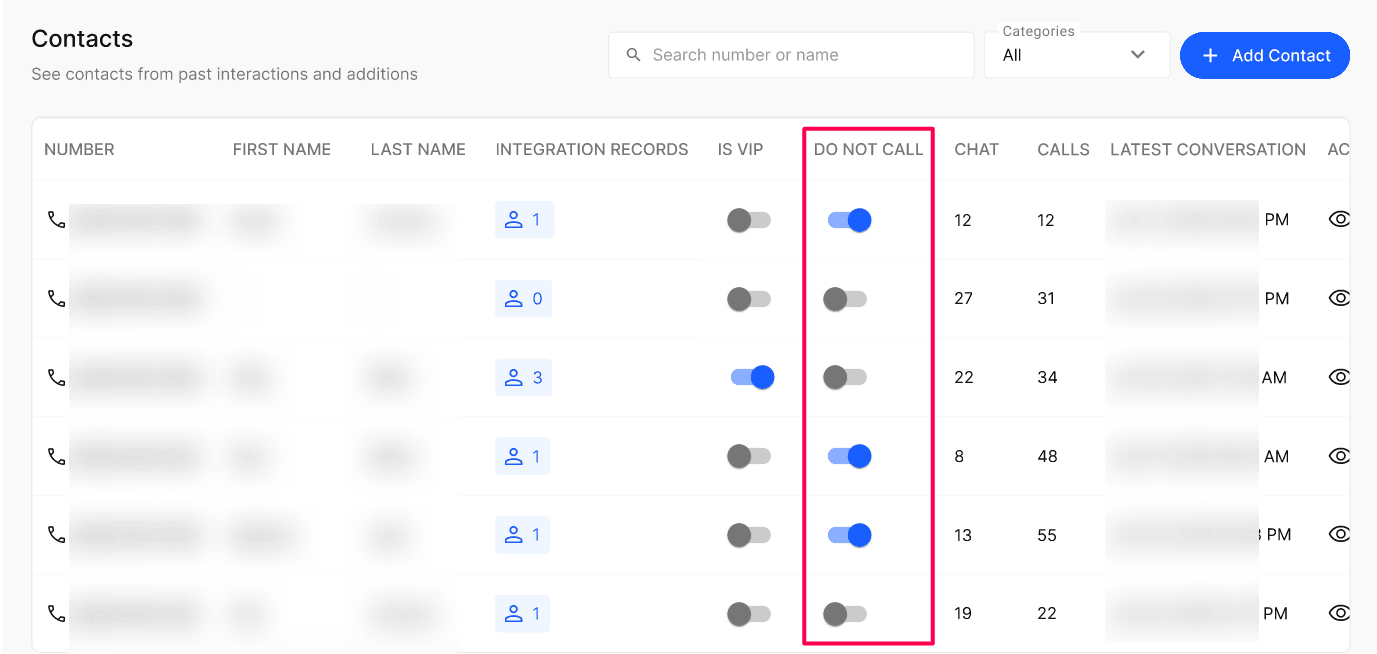
Turn the toggle off at any time to allow outgoing calls to the number again.
Contacts list columns
Add a contact manually
Use this option when you want to add a caller before their first conversation, such as an important customer or partner.
Open Contacts. Select + Add Contact.
Enter the contact’s Number. Select the correct country code from the flag dropdown.
Enter the First Name and Last Name. Both are required.
Optionally turn on This is a VIP Customer to flag the contact as a VIP, or Do not Call to block outgoing calls to the number.
Select Save.
Review contact details
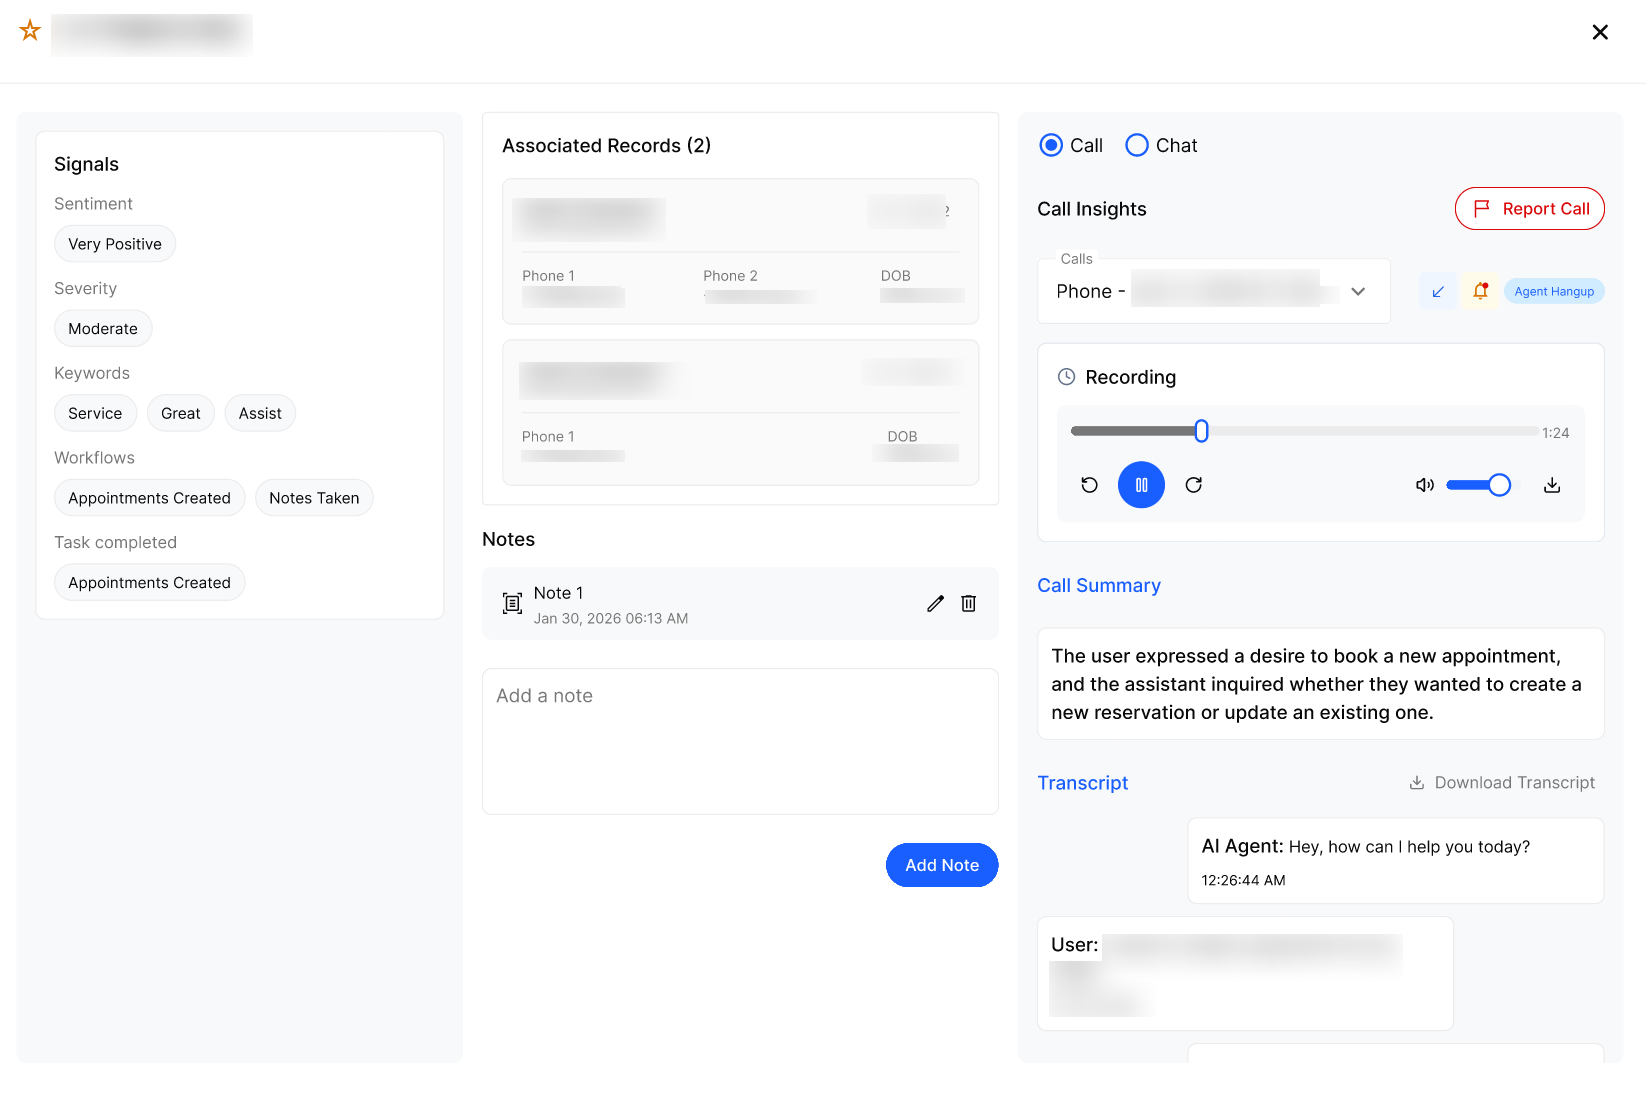
Select the eye icon in a contact row to open the detail view.
Use the Call / Chat switch to move between call history and chat history. Use the session dropdown to select a conversation by date.
Add or manage a contact note
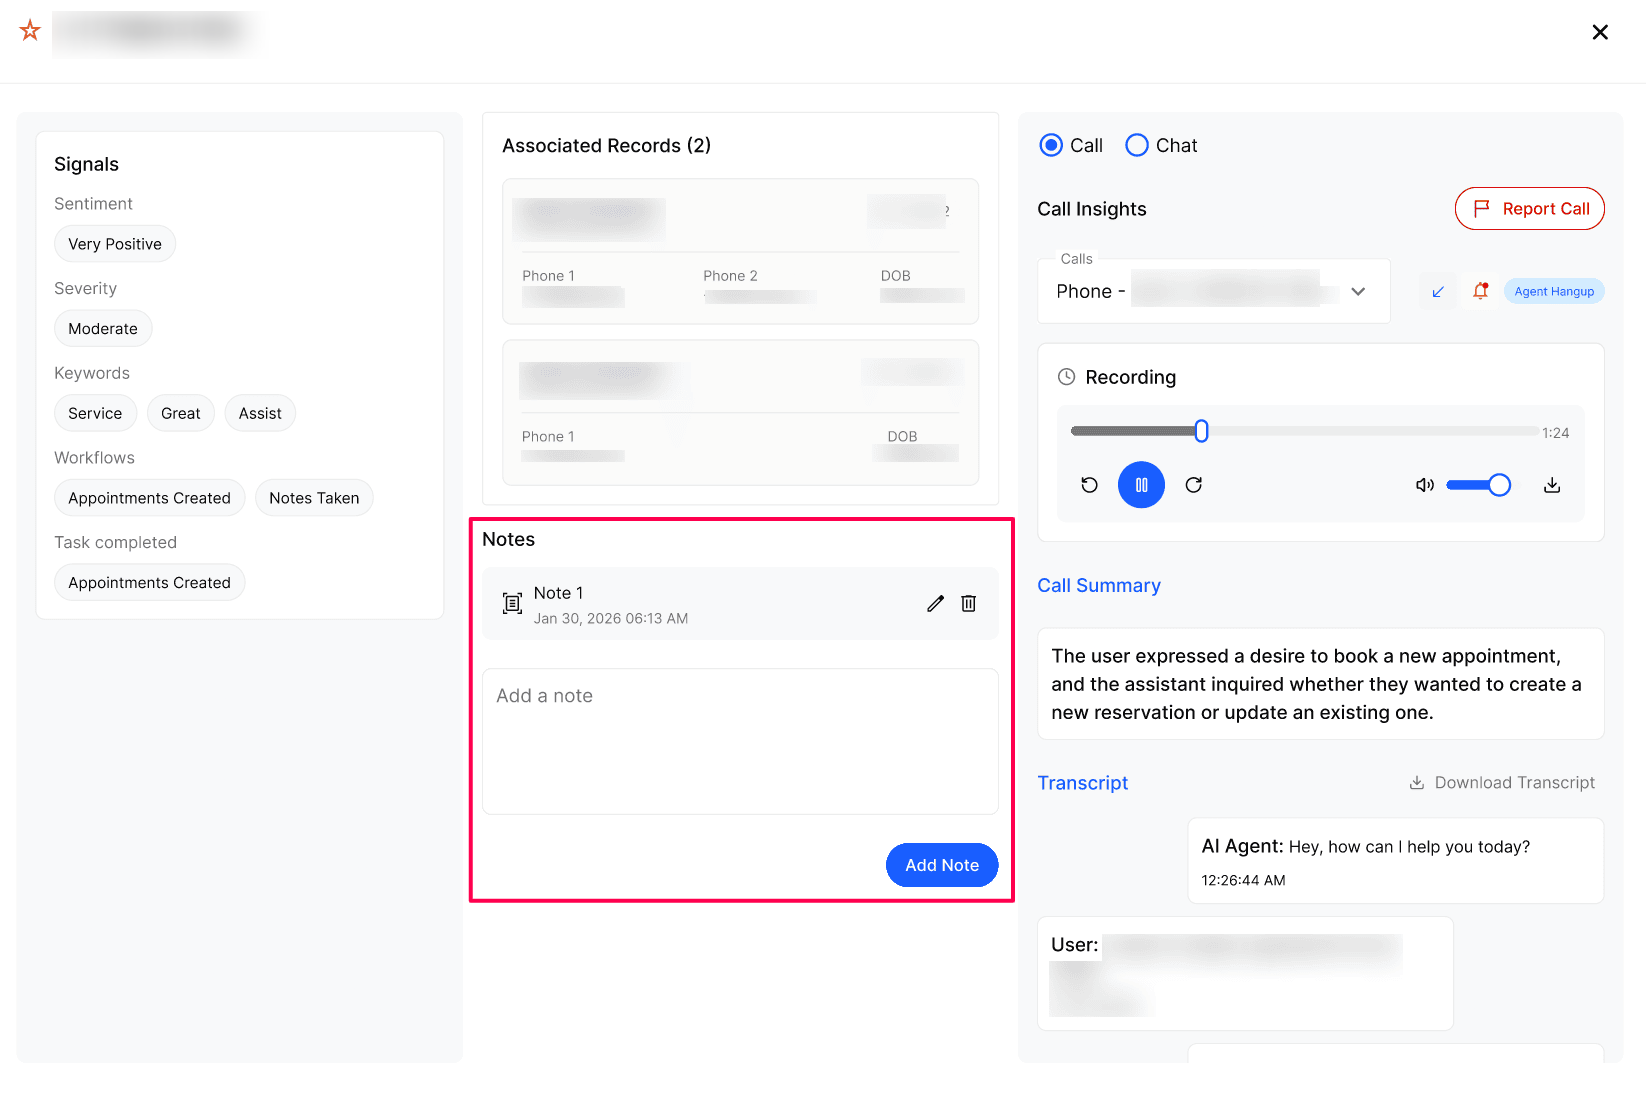
Open the contact detail view. Find the Notes panel.
Add a note connected to the contact.
Edit or delete an existing note when necessary.
Notes remain connected to the contact so your team can review them during future interactions.
Verify the result
Set Categories to VIP and confirm the contact is listed.
Search for a manually added number and confirm it appears.
Open the contact's next conversation in Call Logs or Chat Logs and confirm your note shows.
Troubleshooting
Frequently Asked Questions
Do I need to create contacts manually?
Do I need to create contacts manually?
No. Contacts are normally created automatically when a call, web chat, or SMS conversation arrives. You can add a contact manually when you want to create a record before the first conversation.
What does the Is VIP toggle do?
What does the Is VIP toggle do?
It marks the phone number as a VIP so you can filter and review important callers more easily. The change saves immediately and can be turned off later.
Why does one number show more than one associated record?
Why does one number show more than one associated record?
Multiple contact records may match the same phone number. The Contacts list shows the primary name and the number of additional matches.
Why does a contact show as “Unknown Caller”?
Why does a contact show as “Unknown Caller”?
The number does not currently match an associated contact record.
What is the difference between the Chat and Calls counts?
What is the difference between the Chat and Calls counts?
Chat shows the number of web chat or SMS sessions. Calls shows the number of phone calls associated with that number.
Can I see older conversations from the same number?
Can I see older conversations from the same number?
Yes. Open the contact detail view and use the Call / Chat switch and session dropdown to review available conversations.
Can I report a problem call from the Contacts screen?
Can I report a problem call from the Contacts screen?
Yes. Open the relevant call from the contact detail view and use the Report button when it is available.
Related articles
Was this helpful?
Still need help? Ask the team