Asterisk
Written By Maruf Ansari
Last updated About 2 months ago
Asterisk is one of the most widely used open-source phone systems, and Kickcall connects to it natively using SIP trunking — a direct, reliable signaling link that lets calls flow between your Asterisk system and your agent.
Because this is a native integration, Kickcall handles most of the underlying setup for you. Unlike a typical SIP trunk, you won't need to provide a phone number or whitelist any IP addresses for inbound calls — your agent is identified by a unique Agent ID instead, and the required routing is configured automatically in the background.
Setting up the connection has two independent parts, covered in this guide:
Inbound (Origination) — calls arriving at your agent. This takes a single copy-and-paste step on your end.
Outbound (Termination) — calls your agent places out through your Asterisk system. This needs a few details about your Asterisk server.
Getting started
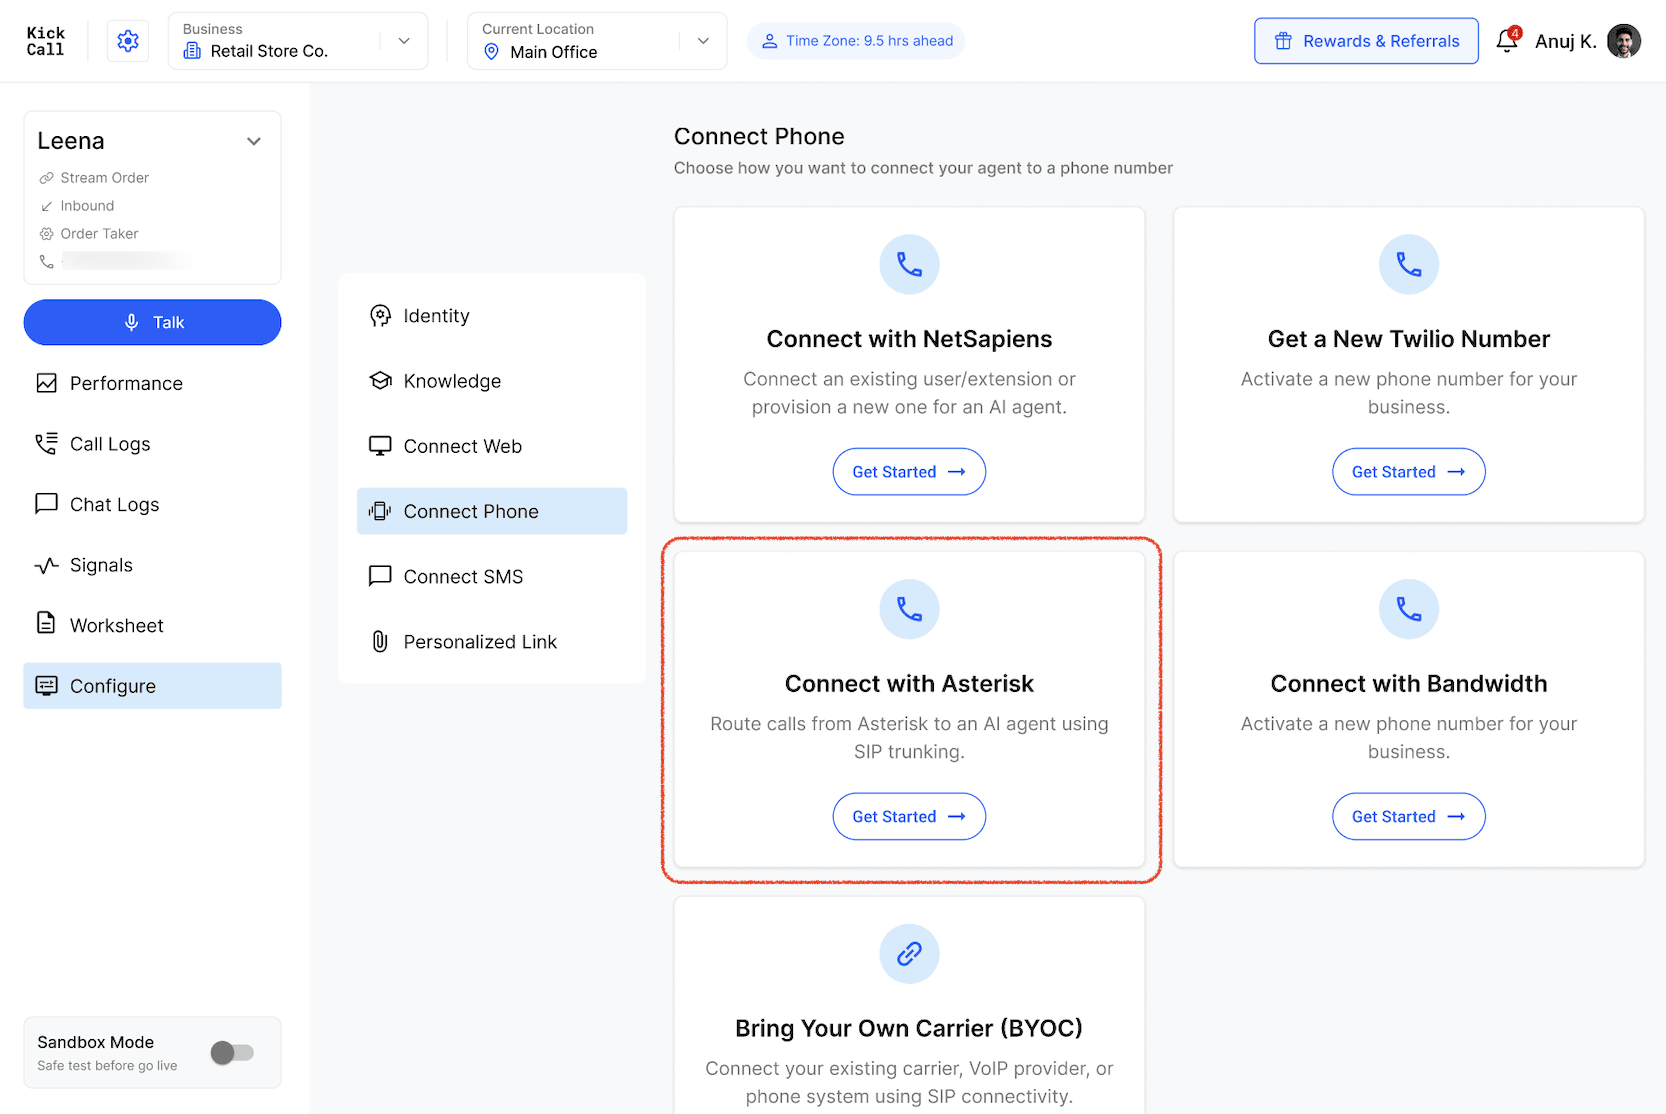
Open Connect Phone. From your agent, go to Configure → Connect Phone.
Choose Connect with Asterisk. Select the Connect with Asterisk card — described as routing calls from Asterisk to your agent using SIP trunking — and select Get Started.
Inbound configuration (Origination)
This half handles calls arriving at your agent — for example, a customer calling your business number. Turn on the toggle at the top of this section to enable it.
Locate your Origination URI. When you open the Asterisk configuration screen, Kickcall has already generated an Agent ID and, from it, an Origination URI for your agent. Both fields are pre-filled — you don't need to enter anything.
Copy the Origination URI. Select the copy icon next to the Origination URI field to copy it.
Paste it into your Asterisk dialplan or trunk. In your Asterisk system, use this URI as the destination for calls you want routed to your agent, then select Save Configuration.
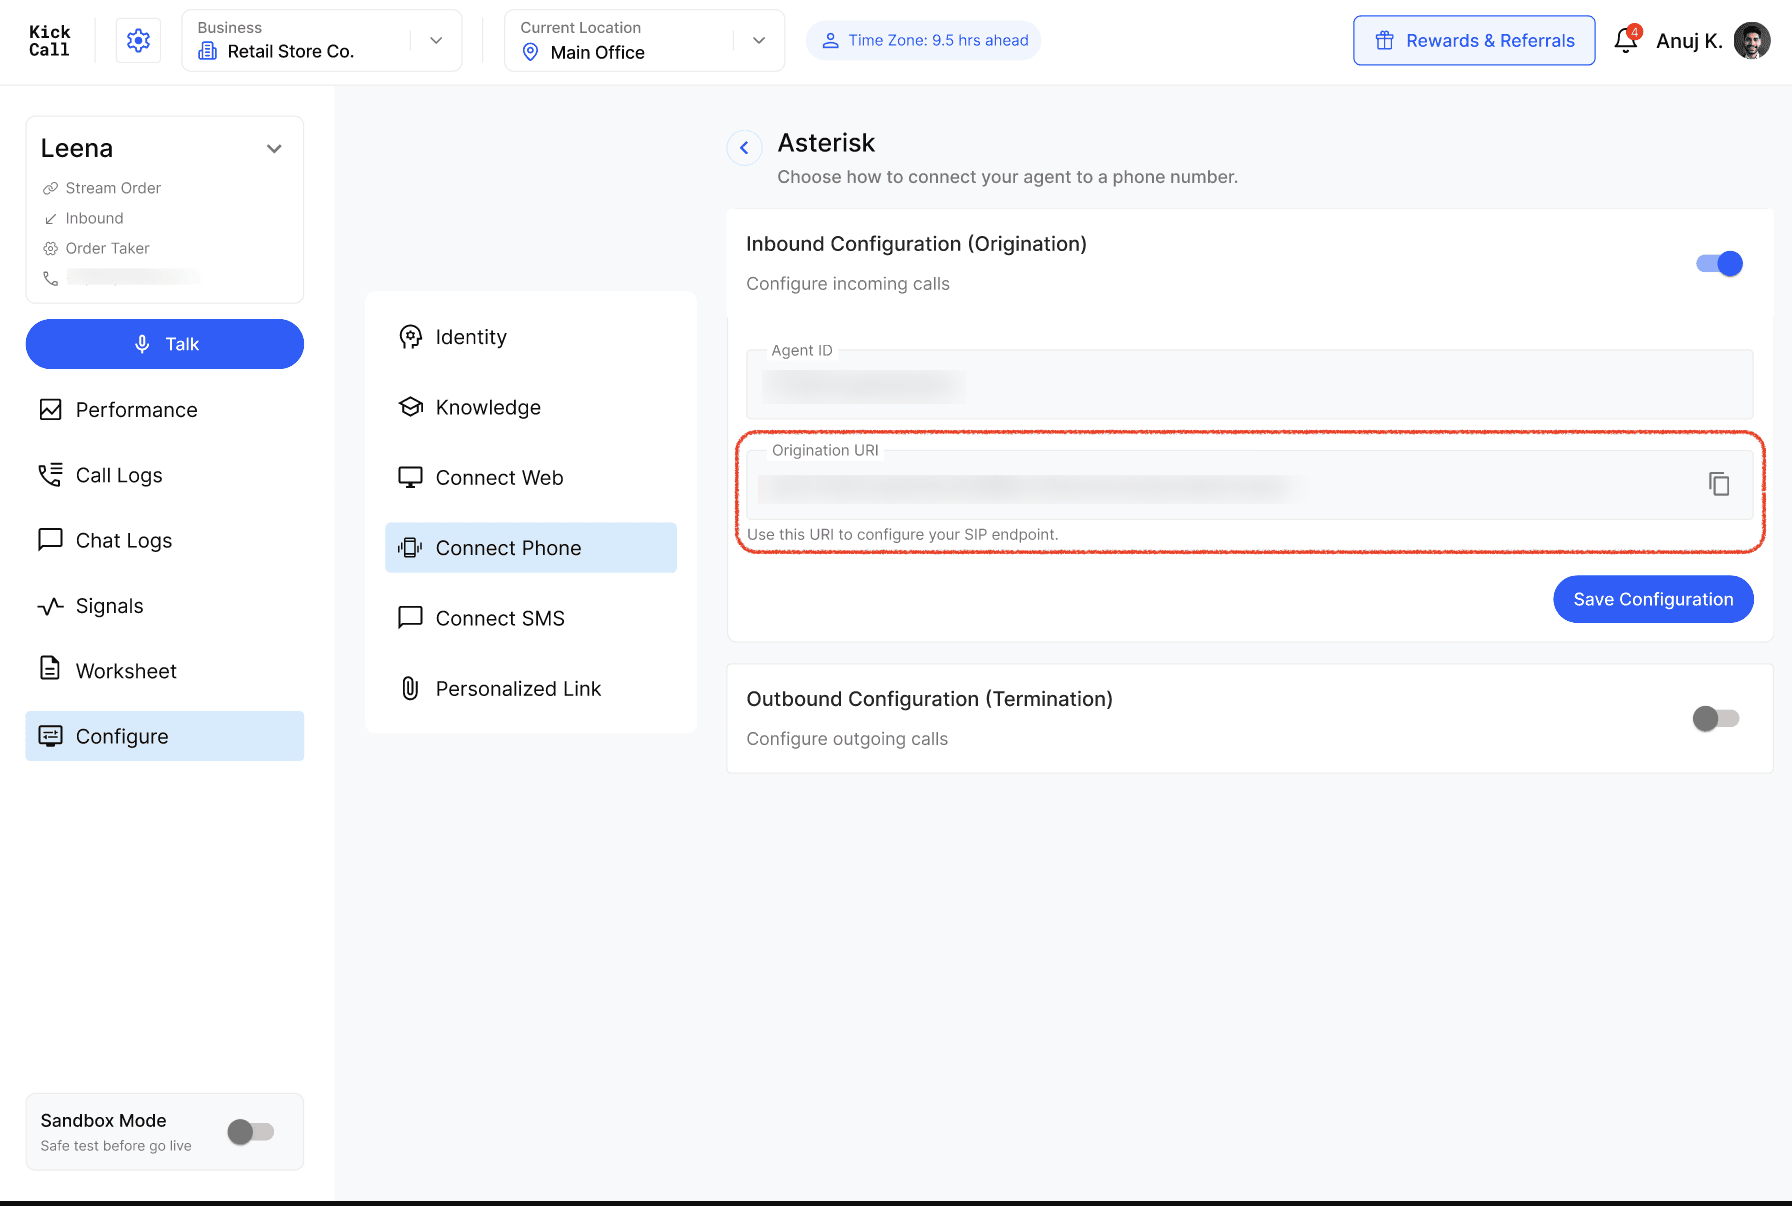
No phone number or IP address needed. Unlike a standard SIP trunk, you won't be asked to enter a phone number or whitelist any IP addresses for inbound calls. Your Agent ID uniquely ties the Origination URI to your agent, and Kickcall applies the matching configuration on its side automatically — there's no additional field to complete.
Outbound configuration (Termination)
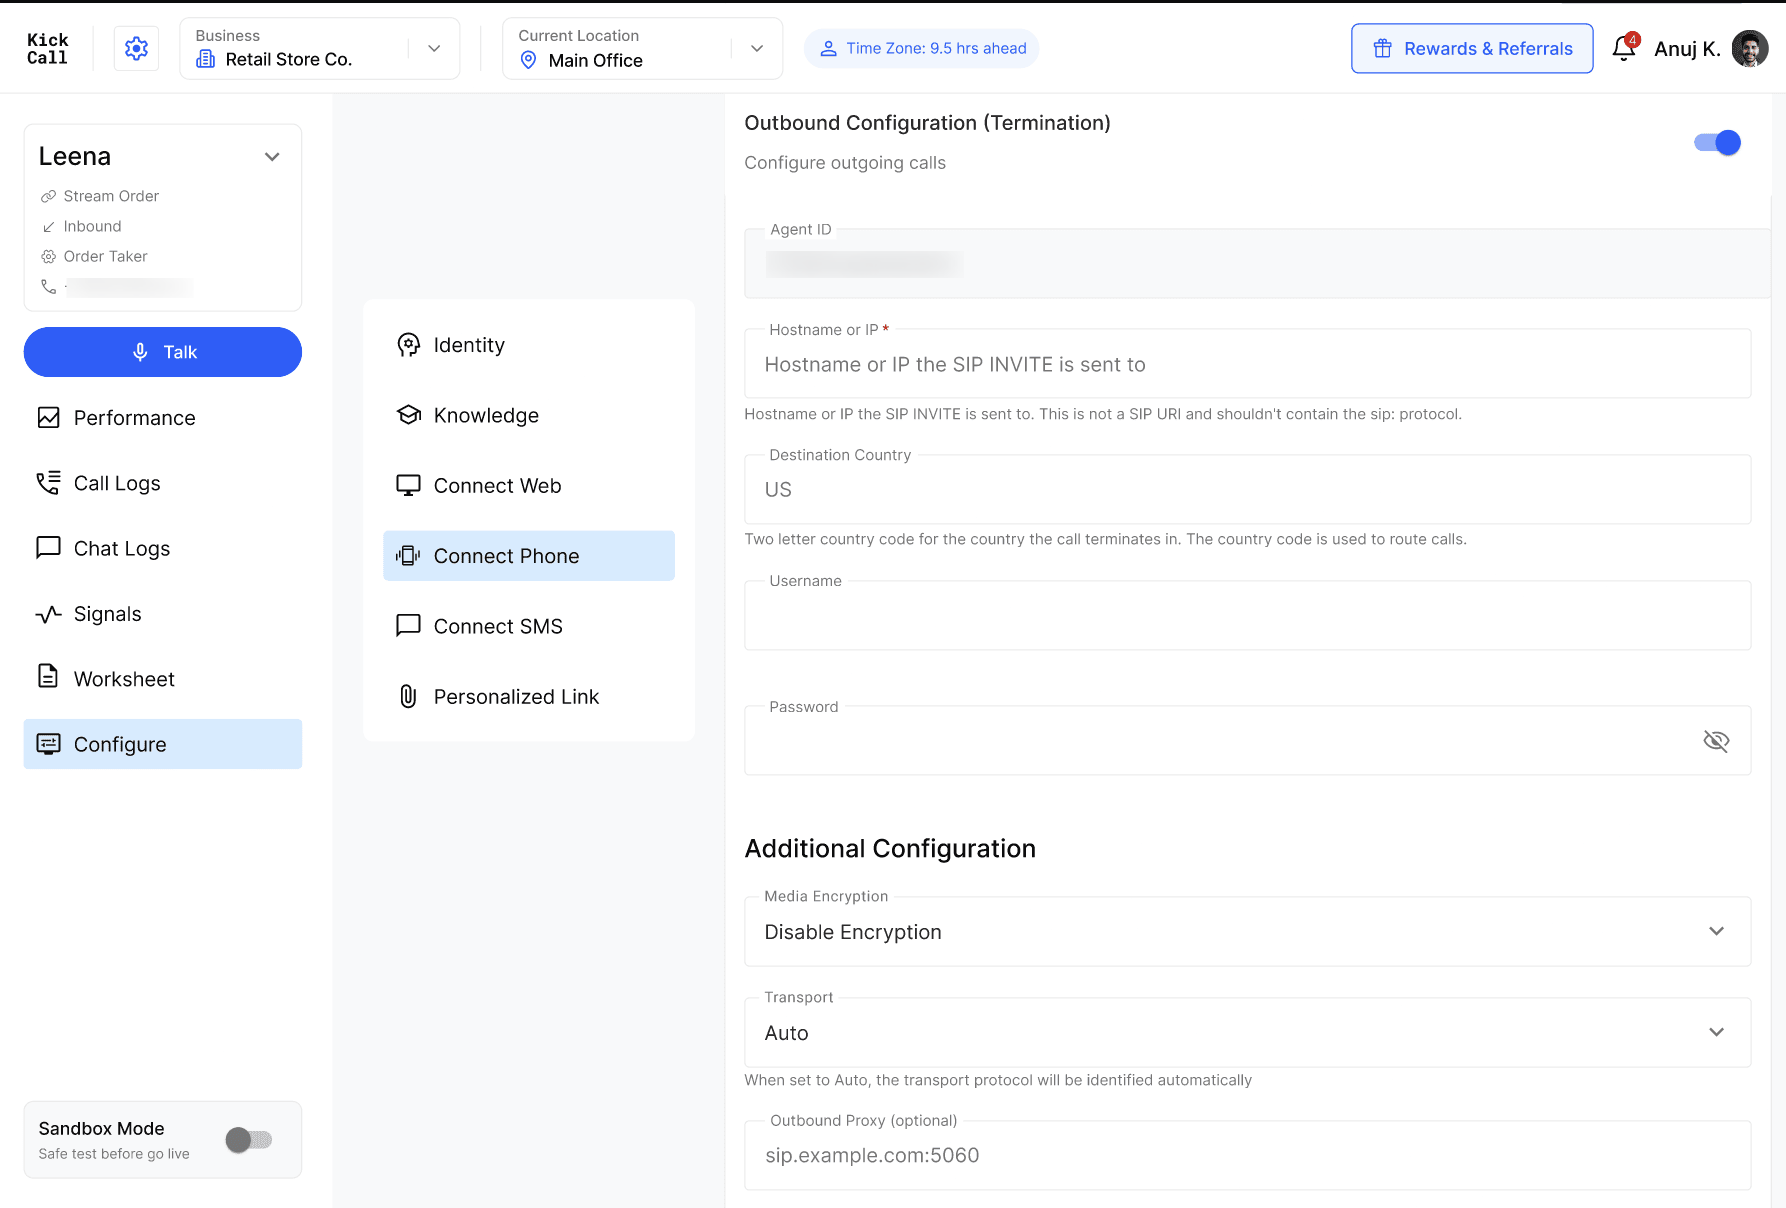
This half handles the other direction — calls your agent places out through your Asterisk system, for example to reach a customer. Turn on the toggle at the top of this section to configure it.
Your Agent ID is already filled in here too. What's left is to tell Kickcall where your Asterisk server is, and how to reach it.
Required field
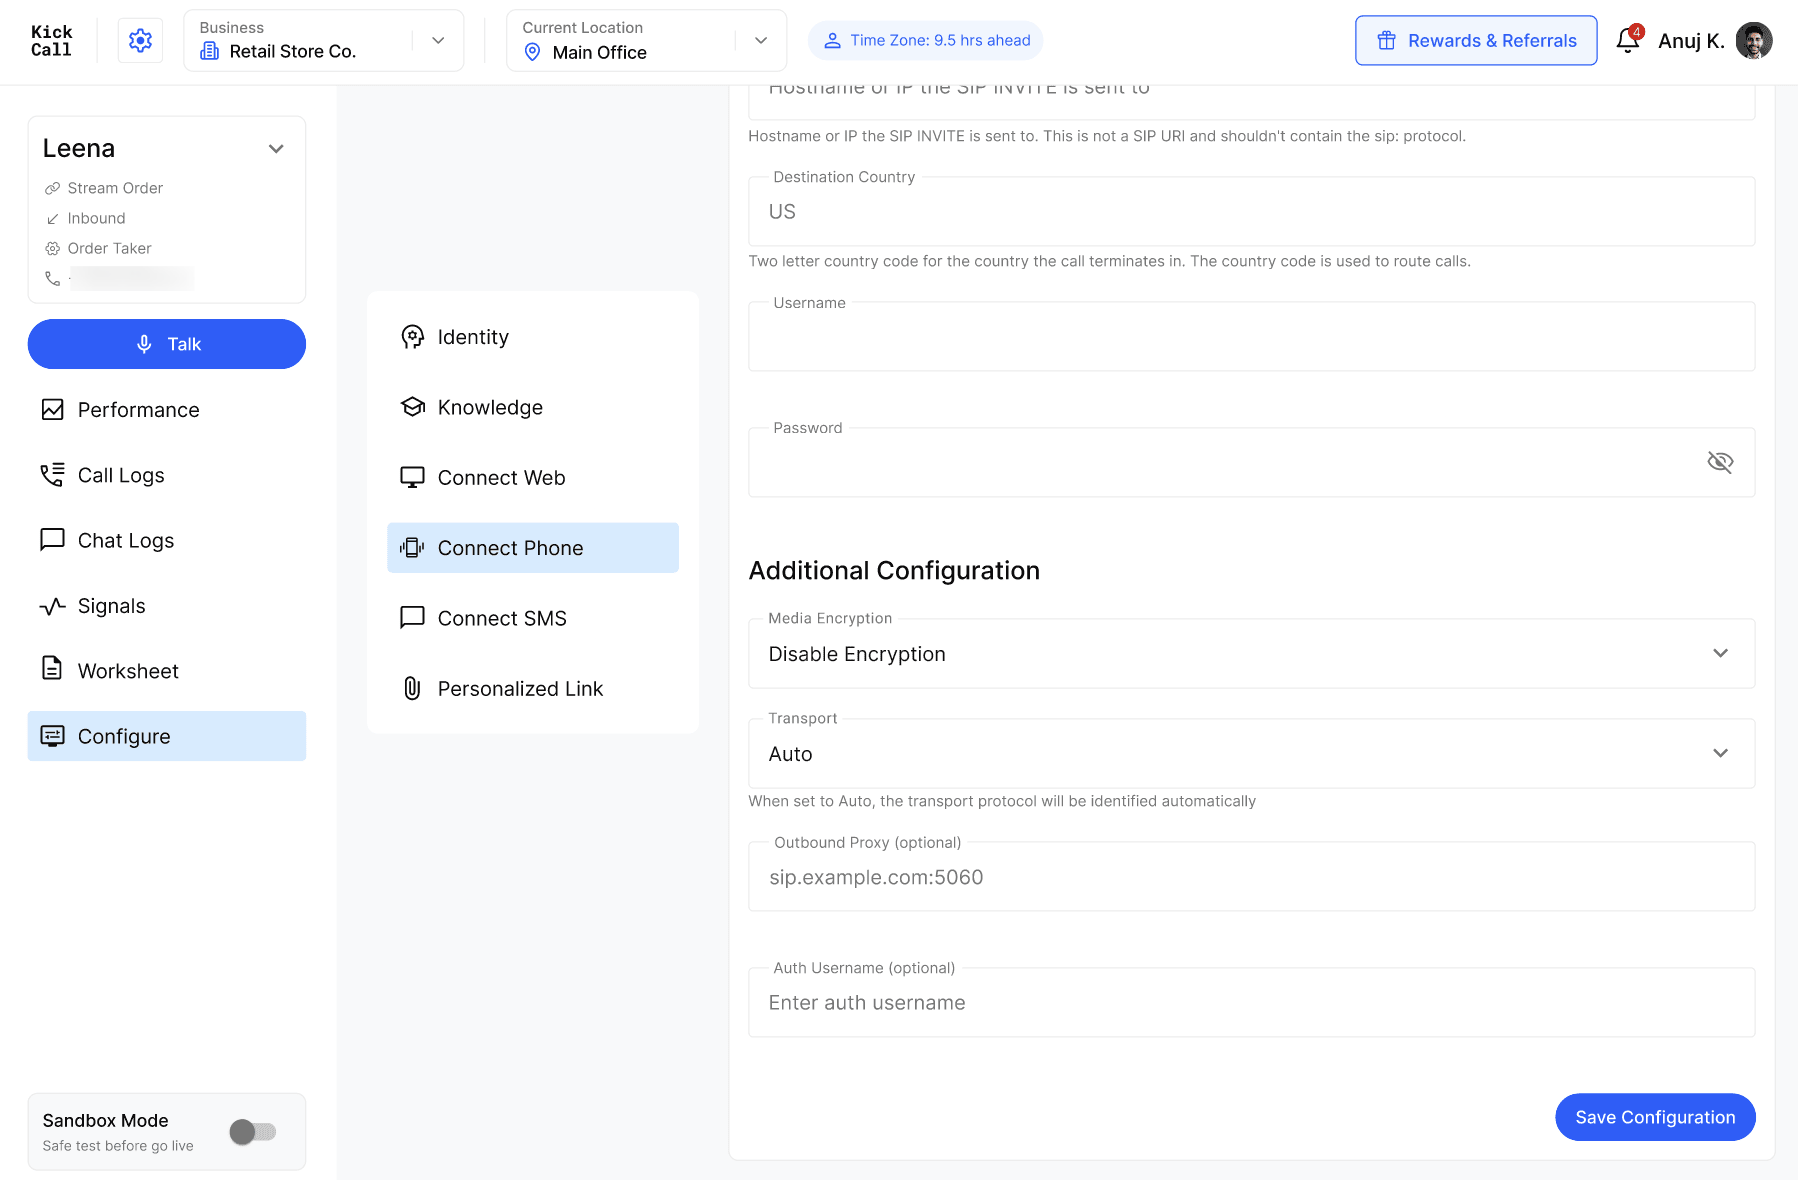
Optional fields
These help Kickcall route calls correctly or authenticate with your Asterisk server, if it requires it. Leave any of these blank if they don't apply to your setup.
Some Asterisk setups only accept traffic from approved IP addresses. If yours does, whitelist the following subnets on your firewall so outbound calls from your agent aren't blocked. This is only needed for outbound calls — there's nothing to whitelist for inbound.
Please refer to the IP Whitelist document for the current list of ranges to add. Outbound calls may fail to connect until all listed ranges are whitelisted on your side.
Save your configuration
Once you've entered your Hostname or IP (and any optional fields your setup needs), select Save Configuration.
Quick reference
What happens next
Once both halves are configured and saved:
Inbound calls sent to your Origination URI will reach your agent immediately.
Outbound calls placed by your agent will route through the Asterisk server you specified.
You can come back and update your Outbound settings at any time if your Asterisk server's address or credentials change.